
Diablo 4 Season 4: A Guide to Conquer the Hellish Realms

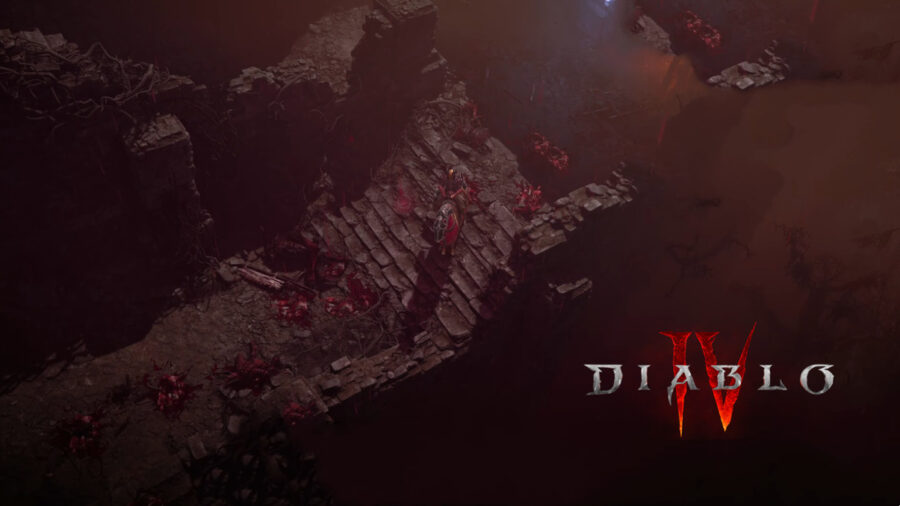
In the ever-expanding world of Diablo 4, Season 4 emerges as a cataclysmic event, reshaping the landscape of demon-infested realms and presenting new challenges and opportunities for seasoned adventurers and newcomers alike. With the resurgence of the Hell Tides, the reworking of unique item drops, and a plethora of gameplay enhancements, Diablo 4 Season 4 promises an exhilarating journey through the depths of darkness. Let’s delve into the abyss and uncover the secrets of this enthralling season.

  1. The Resurgence of Hell Tides

The Hell Tides, once dormant, have been reinvigorated with newfound terror. With significantly higher monster density and a starting point at World Tier 1, they offer a relentless onslaught of demonic forces from the very beginning of the game. Unlike their previous incarnations, the Hell Tides now remain active at all times, save for brief five-minute intervals. This evolution has transformed them into arguably the most efficient method of leveling in all of Diablo. By embarking on the treacherous journey through the Hell Tides, adventurers not only progress their characters but also acquire valuable resources and D4 materials essential for their survival in the infernal realms.

  1. The Evolution of Unique Item Drops

In Season 4, all unique items, excluding Uber unique items, will drop at World Tier 3 or higher. This pivotal change underscores the importance of swiftly ascending to World Tier 3 to access these pivotal gear pieces. Unique items, distinguished by their four base affixes, now hold greater significance in character builds. While legendary items offer the potential for five affixes through tempering, unique items possess inherent strength with their base affixes, complemented by the ability to incorporate multiple greater affixes and undergo Masterworking. This shift in itemization emphasizes the strategic acquisition and utilization of unique items to craft formidable builds capable of challenging the darkest horrors of Sanctuary.

  1. Embrace the Art of Trading

Trading emerges as a cornerstone of Season 4, offering unparalleled opportunities for adventurers to exchange goods and bolster their arsenals. Unique items, legendary items, and a myriad of other treasures can now be freely traded, enriching the communal experience of the Diablo universe. Whether seeking to complete a coveted set or acquire materials for Masterworking, the trading system facilitates seamless transactions, enhancing the gameplay experience for solo adventurers and collaborative groups alike. With Diablo 4 gold assuming a newfound importance in the realm of Masterworking, savvy traders can leverage their assets to procure essential resources and gain a competitive edge in the eternal struggle against the forces of darkness.

  1. Armor Reimagined

The dynamics of armor have undergone a profound transformation in Season 4, with a maximum physical damage reduction capped at 85% and 9,230 armor. The introduction of Juggernaut’s Aspect ensures that achieving this cap is attainable with minimal investment, liberating adventurers from the relentless pursuit of armor-based mitigation. With armor no longer a primary concern, players can divert their focus towards fortifying other defensive layers, such as resistances, barriers, and fortifications, to achieve unparalleled resilience against the relentless onslaught of demonic adversaries.

  1. Unleash the Power of Crafting

Season 4 introduces a revolutionary crafting system that empowers adventurers to forge their destiny with unrivaled precision. Through the Reputational System and the acquisition of Resplendent Sparks, players can craft Uber unique items of their choosing, transcending the constraints of chance and forging a path towards unparalleled strength. By harnessing the power of crafting, adventurers can tailor their arsenal to suit their playstyle, ensuring that every weapon, every piece of armor, bears the mark of their indomitable will.

  1. Strategic Leveling and Build Optimization

Efficient leveling and build optimization emerge as key strategies in conquering the challenges of Season 4. By employing dedicated leveling builds and leveraging Scrolls of Amnesia to reset skill trees and Paragon boards, adventurers can expedite the leveling process and transition seamlessly into endgame content. The implementation of the Codex streamlines the acquisition of unique items, ensuring that players are well-equipped to tackle the trials that await them. Whether following a predefined leveling path or forging their own, adventurers must adapt and evolve, harnessing every tool at their disposal to emerge victorious against the encroaching darkness.

  1. Mastery of Item Management

The art of item management takes on renewed importance in Season 4, as adventurers navigate the treacherous labyrinth of demonic realms. With legendary and unique items automatically returning to the stash, players can optimize their inventory management, focusing on the acquisition of only the most essential gear. By prioritizing efficiency and strategic acquisition, adventurers can maintain a lean inventory, ensuring that every piece of gear serves a purpose on their journey towards greatness.

  1. The Evolution of Boss Encounters

Boss encounters undergo a transformative evolution in Season 4, with the Boss Ladder offering new challenges and opportunities for intrepid adventurers. By strategically leveraging boss materials, players can summon formidable adversaries and reap bountiful rewards, propelling them ever closer to the pinnacle of power. With reduced material requirements and enhanced drop rates, the Boss Ladder presents a tantalizing prospect for those bold enough to undertake its trials, offering both risk and reward in equal measure.

Conclusion

Diablo 4 Season 4 stands as a testament to the enduring legacy of Sanctuary, offering a wealth of new challenges, opportunities, and adventures for players to explore. From the relentless onslaught of the Hell Tides to the strategic intricacies of item management and crafting, Season 4 embodies the spirit of exploration and discovery that defines the Diablo experience. As adventurers embark on their journey through the depths of darkness, they must embrace the ever-present dangers that lurk within and emerge victorious, their legend etched into the annals of history for all eternity.

WoW Cataclysm Classic: A Casual’s Guide to Preparation and Profits

Welcome to the realm of Azeroth, where adventures await at every turn, and challenges arise from the depths of the earth to the highest peaks of the sky. As the world prepares for the resurgence of Cataclysm Classic, seasoned veterans and newcomers alike find themselves pondering the best strategies for success in this revamped era of World of Warcraft. In this comprehensive guide, we’ll explore how to navigate Cataclysm Classic with ease, focusing on preparation, leveling strategies, gold-making techniques, and more.

Embrace the Chill: Preparation without the Stress

The first piece of advice for any aspiring adventurer diving into Cataclysm Classic is simple: chill out. While meticulous preparation may be necessary for the elite few striving for top-tier competitive dominance, for the vast majority of players, it’s more about enjoying the journey than obsessing over optimization.

Forget about meticulously farming ICC 25-man heroic gear or obsessing over minute details. By the time you’re knee-deep in level 82 quests, that gear will be outdated. Instead, focus on the broader picture: being able to clear raids efficiently when the time comes. Remember, it only takes a couple of days to reach the maximum level, even with a casual approach.

Leveling Made Easy: Embracing Remote PC Software

In the age of technological marvels, leveling up in World of Warcraft has never been more convenient. Thanks to remote PC software, you can now progress your characters and farm gold from virtually anywhere, whether you’re waiting for a bus or lounging on a sun lounger.

Imagine effortlessly controlling your character with a specially designed Warcraft keyboard while soaking up the sun. With apps like Sun Remote, the possibilities are endless. Utilize the free trial to experience the convenience firsthand and revolutionize your gaming experience.

The Gold Rush: Professions and Passive Income

In Cataclysm Classic, gold reigns supreme, and savvy players know that passive income is the key to financial freedom. Rather than toiling away for hours on end, invest your efforts wisely by leveling up lucrative professions like Alchemy, Jewelcrafting, Enchanting, and Tailoring.

Harness the power of gold flipping by utilizing addons like Auctionator to identify profitable opportunities on the auction house. Whether it’s crafting in-demand items or exploiting cooldown crafts like Transmute True Gold, professions pave the way to effortless wealth.

Swift Progression: Leveling Guides and Efficient Farming

For those seeking to expedite their journey to level 85, a reliable leveling guide is essential. Rested XP has curated a comprehensive route designed to optimize your leveling experience, ensuring you reach your destination swiftly and efficiently.

When it comes to gold-making, nothing beats farming old raids with a Blood Death Knight. With Cataclysm Heroic Dungeon gear in tow, you’ll effortlessly amass wealth and coveted transmog items. Additionally, capitalize on daily quests and profession flips to bolster your coffers without breaking a sweat.

Strategic Planning: Guild Selection and Dungeon Preparation

Choosing the right guild can make or break your Cataclysm Classic experience. Before committing, ascertain whether the guild aligns with your playstyle and objectives. Whether you prefer a laid-back atmosphere or thrive on hardcore challenges, clarity is key to avoiding disappointment down the line.

As you prepare to tackle heroic dungeons, don’t overlook the importance of gearing up efficiently. By strategically purchasing Justice Point and Honor gear at level 85, you can circumvent the arduous grind and expedite your journey to dungeon-ready status.

Conclusion: Navigating Cataclysm Classic with Confidence

As the world of Azeroth braces for the cataclysmic upheaval that lies ahead, adventurers must arm themselves with knowledge and preparation. Whether you’re a casual player seeking to enjoy the journey or a seasoned veteran aiming for the pinnacle of achievement, there’s a place for everyone in Cataclysm Classic.

By embracing a relaxed approach to preparation, leveraging remote PC software for convenience, and mastering the art of WoW Cataclysm gold-making through professions and passive income, you’ll chart a course to success in this revitalized realm of World of Warcraft. So, heed these words of wisdom, embark on your adventure with confidence, and may the winds of fortune guide you to glory in Cataclysm Classic.

Unleashing Destruction: The Death’s Poker Build in Elden Ring

In the vast and treacherous lands of the Elden Ring, where danger lurks at every corner and formidable foes await, mastering the art of combat is essential for survival. Among the myriad weapons that adventurers wield, there exists one that stands out for its sheer power and notorious reputation—Death’s Poker. Renowned for its ability to decimate enemies and bosses alike with unparalleled efficiency, the Death’s Poker is hailed as the most broken weapon in all of Elden Ring.

Obtaining the Death’s Poker

Obtaining the Death’s Poker is a pivotal moment for any player seeking to dominate the lands of Elden Ring. Fortunately, acquiring this formidable weapon is relatively straightforward. Venturing southeast from the Southern Aonia Swamp Bank, adventurers will find themselves in Kalid. Under the cloak of night, a Deathright Bird wielding the Death’s Poker awaits challengers. Defeating this formidable adversary bestows upon the victor the coveted Death’s Poker, granting them unparalleled power in battle.

The Power of the Death’s Poker

What sets Death’s Poker apart from other weapons is its unique Ghost Flame Ash of War. This ethereal flame possesses the ability to shred through the health bars of even the most resilient foes in a matter of seconds. With minimal stat requirements, focusing on intelligence allows wielders to unleash devastating damage, reaching tens of thousands in mere moments.

The Unstoppable Build

To fully harness the potential of Death’s Poker, a specific build tailored to maximize its effectiveness is paramount. The build centers around intelligence, ensuring that every strike with the Death’s Poker is as lethal as possible. Here’s a breakdown of the recommended build:

Vigor: 50
Mind: 20
Endurance: 24
Strength: 15
Dexterity: 17
Intelligence: 60
Faith: 33
Arcane: 10

By investing in intelligence and faith, players unlock the full potential of Death’s Poker, unleashing devastating attacks that leave enemies reeling.

The Key Components

To augment the destructive power of the Death’s Poker, specific spells, incantations, and talismans are crucial. The synergy between these elements amplifies the weapon’s already formidable prowess:

Ash of War: Utilize the Ghost Flame Ash of War to unleash torrents of ghostly energy upon foes, inflicting relentless damage over time.
Golden Veil and How of Shabiri: These incantations further enhance damage output, albeit at the risk of increased vulnerability.
Talisman Selection: Equip talismans such as the Shard of Alexander, Graven Mass Talisman, and Magic Scorpion Charmers to bolster sorcery damage and overall effectiveness.
Armor Considerations: Selecting appropriate armor pieces to mitigate damage while maximizing offensive capabilities is crucial for survivability in combat.

Unleashing Destruction

Armed with Death’s Poker and meticulously crafted Elden Ring Items, players become unstoppable forces on the battlefield. Whether facing hordes of enemies or challenging bosses, the Death’s Poker build leaves a trail of destruction in its wake. By mastering the intricacies of the build and honing combat skills, adventurers can conquer even the most daunting adversaries with ease.

Conclusion

In the ever-expanding world of Elden Ring, the Death’s Poker reigns supreme as the ultimate weapon of destruction. With its unparalleled power and devastating capabilities, it has rightfully earned its place as a legend among adventurers. By embracing Death’s Poker build and harnessing its full potential, players embark on a journey of unparalleled dominance, leaving their mark on the world of Elden Ring.

Do you want to quickly obtain the weapons and equipment in this Build? MMOexp provides cheap Elden Ring Runes, allowing you to get the items you want more easily.

Mastering Gold Farming in Night Crows: Essential Tips and Strategies

In the realm of Night Crows, amassing gold is a crucial endeavor for adventurers seeking to enhance their equipment and abilities. With strategic planning and prudent decision-making, players can efficiently farm gold while avoiding unnecessary expenditures. Let’s delve into effective strategies and indispensable tips for maximizing gold farming in Night Crows.

1, Utilize Dungeons Efficiently: One of the primary avenues for gold farming is through dungeons. Focus on higher-level dungeons where the potential for gold drops is greater. Save your recharge time for optimal dungeon farming sessions, and consider using F buffs to increase farming efficiency. By consistently farming dungeons, you can accumulate a significant amount of gold over time.

2, Complete Quests for Rewards: Engage in various quests, including main quests, side quests, and daily quests, to earn valuable gold rewards. Main quests offer substantial gold rewards and are essential for progressing through the game. Additionally, completing side quests and daily quests can provide supplementary sources of gold income. Be diligent in quest completion to maximize your earnings.

3, Participate in Achievements and Adventures: Explore achievements and adventures to unlock additional opportunities for gold acquisition. Completing achievements and adventure tasks often yields generous gold rewards. Focus on tasks that align with your gameplay style and objectives to efficiently earn gold through achievements and adventures.

4, Strategic Market Transactions: Leverage the market to sell high-demand items and generate gold income. Monitor market trends and identify items with favorable selling prices, such as gear, crafting materials, and codex items. Avoid unnecessary market purchases that may deplete your gold reserves, and prioritize selling items to increase your gold wealth.

5, Optimize Skill Investments: When considering skill purchases, prioritize acquiring essential skills that align with your character’s build and playstyle. While it may be tempting to purchase all available skills, focus on acquiring skills that offer tangible benefits and enhance your combat effectiveness. Carefully invest in skills that contribute to your overall progression without draining your gold reserves unnecessarily.

6, Avoid Wasteful Expenditures: Exercise caution to avoid wasteful spending that may deplete your gold reserves unnecessarily. Refrain from excessive expenditures on items with limited utility, such as special dungeon entries, enhanced scores, and skill purchases. Instead, focus on strategic investments that yield tangible returns and contribute to your long-term success in Night Crows.

By implementing these strategies and adhering to prudent financial management practices, players can effectively farm gold in Night Crows while optimizing their resources for maximum efficiency. With patience, diligence, and strategic planning, you can amass a formidable fortune and achieve unparalleled success in the vibrant world of Night Crows. And Night Crows Diamonds buy at mmoexp.com, get easy and cheap, join us now.

Last Epoch: A Guide to Uniques, Legendaries, and Power Progression

In the ever-evolving landscape of Last Epoch, as you traverse through its rich tapestry of epochs and dimensions, you find yourself reaching a pivotal juncture: the endgame. Having honed your skills, crafted your build, and delved into the depths of its campaign, you now stand on the precipice of a new journey—one that delves deeper into the realms of power and progression. At the heart of this journey lie unique, legendaries, and the pursuit of absolute strength.

Unraveling the Mysteries of Unique

Uniques, the prized possessions of every Last Epoch adventurer, hold the potential to elevate your character to new heights. But obtaining them is no simple task; it requires cunning, perseverance, and a dash of luck. In the early stages, the acquisition of uniqueness may seem entirely at the mercy of RNG (Random Number Generation). Yet, there are avenues to tilt the odds in your favor.

One such avenue is the Rune of Ascendance, a coveted crafting item that bestows upon you the power to transform any item into a unique of the same slot. While these runes are rare, they serve as a beacon of hope, allowing you to target farm-specific uniques essential for your build.

Monoliths of Fate: The Nexus of Power

As you venture deeper into Last Epoch’s endgame, the Monoliths of Fate emerge as your primary hunting grounds. Each timeline within the monolith offers a unique opportunity to farm for specific unique and set pieces. Whether you seek the elusive bow of the Fall of the Outcasts or the mystical relics of the Last Ruin, each timeline holds the promise of great rewards.

Empowered monoliths and higher corruption ratings further amplify your chances of obtaining legendary potential—a crucial aspect of endgame progression. With each echo conquered, you inch closer to unlocking the true potential of your character.

From Uniques to Legendaries: The Path to Ascension

The journey does not end with the acquisition of uniqueness; it merely marks the beginning of a new phase. The true essence of power lies in the transformation of these uniques into legendaries. Through the alchemical fusion of unique items with legendary potential and exalted items, you breathe life into your gear, imbuing it with unparalleled strength.

Legendary potential serves as the linchpin of this transformation, dictating the number of affixes inherited from the exalted item. As you strive for perfection, each roll becomes a gamble, a step towards crafting the ultimate legendary gear for your character.

The Faction Factor: Unlocking Hidden Potential

Amidst the tumult of endgame pursuits, the significance of factions often remains overlooked. By delving deeper into the annals of Last Epoch’s lore, you unlock access to two pivotal factions: the Circle of Fortune and the Merchant’s Guild.

The Circle of Fortune offers prophecies that enhance your chances of acquiring rare gear, while the Merchant’s Guild opens the doors to a vast trade market and allows you to use Last Epoch gold to purchase items needed for your build. Embrace the power of factions, for they hold the keys to unlocking hidden potential and accelerating your journey toward greatness.

Embracing the Journey

In the grand tapestry of Last Epoch, the pursuit of power is not merely a destination but a journey—one filled with trials, triumphs, and the occasional setback. As you navigate through its myriad dimensions, cherish each moment, relish each victory, and learn from each defeat.

From the humble beginnings of your build to the pinnacle of endgame perfection, every step shapes your destiny. So, gather your courage, hone your skills, and embark on the journey of a lifetime. For in the world of Last Epoch, the true adventure has only just begun.

Conclusion

As the echoes of the Last Epoch reverberate through the annals of time, the pursuit of power remains an eternal quest. Through the acquisition of uniques, the crafting of legendaries, and the exploration of factions, you chart your course toward greatness.

So, let the echoes guide you, let the epochs shape you, and let the journey unfold. For in the heart of Last Epoch, amidst the chaos and the mystery, lies the true essence of adventure—a journey that transcends time itself.

Innovating Po8 Mechanics in Skull and Bones: Leveraging Current In-Game Logic

As a seasoned software architect with a passion for gaming that spans decades, I bring a unique perspective to the table when it comes to proposing changes to the Pieces of Eight (Po8) system in Skull and Bones. Drawing upon my extensive experience in both technology and gaming, I present ideas that aim to enhance the Po8 experience by leveraging existing in-game mechanics and logic.

One of the key proposals is to revamp the Po8 pickup mechanism to allow players to gather all items from a single manufacturer in one go. Upon collecting these items, players are presented with three distinct options to choose from, each offering a different gameplay experience.

The first option, “Proceed to Next Region,” becomes available if players have multiple regions unlocked. Opting for this choice initiates a thrilling pursuit by rogue sets as players navigate towards their next destination, adding an element of excitement and challenge to the journey.

Alternatively, selecting “Proceed to Drop Off” triggers a helm wager-style event that is exclusively PvE-oriented. Players must navigate through various obstacles and challenges while fending off rogue sets from previous regions, providing a unique and engaging gameplay experience devoid of PvP interactions.

For those seeking the adrenaline rush of PvP combat, the “Helm Wager” option remains unchanged in terms of its mechanics. However, to level the playing field and promote fair competition, several adjustments are proposed.

Upon initiating a helm wager, players are granted a brief 60-second immunity period during which they are impervious to damage. During this time, other players have the opportunity to join the wager by contributing 10% of the initial wager amount. This ensures that participants have a vested interest in the outcome of the event and encourages active participation.

To prevent exploitation and maintain the integrity of the wager, certain restrictions are imposed. Once the 60-second countdown begins, players cannot fast travel or join the event, and leaving prematurely results in the forfeiture of their wager contribution. Additionally, the location of the player triggering the wager is made visible to all participants, allowing them to strategically position themselves for the impending challenge.

Furthermore, in an effort to incentivize aggressive gameplay and risk-taking, a unique mechanic is introduced. Any player who eliminates a participant who has contributed to the wager sees their wager amount added to the prize pool, creating additional stakes and intensifying the competition.

Ultimately, the player who successfully claims the wager chest upon docking receives the full contents, including any additional contributions made by eliminated participants. This ensures that the rewards are commensurate with the risks taken and the challenges overcome throughout the event.

By integrating these innovative ideas into the existing Po8 mechanics, Skull and Bones can offer players a dynamic and immersive experience that combines strategic decision-making, thrilling encounters, and competitive PvP gameplay. As the game continues to evolve, embracing fresh perspectives and leveraging current in-game logic will be crucial in enhancing the overall enjoyment and longevity of the Po8 system.

MMOexp provide the Skull and Bones Po8 boosting service, Safe and reliable, purely manual operation. We also offer you cheap Skull and Bones Items and Silver service. Hope you like it.

The Mechanics of Capturing and Taming Slaves in Myth of Empires

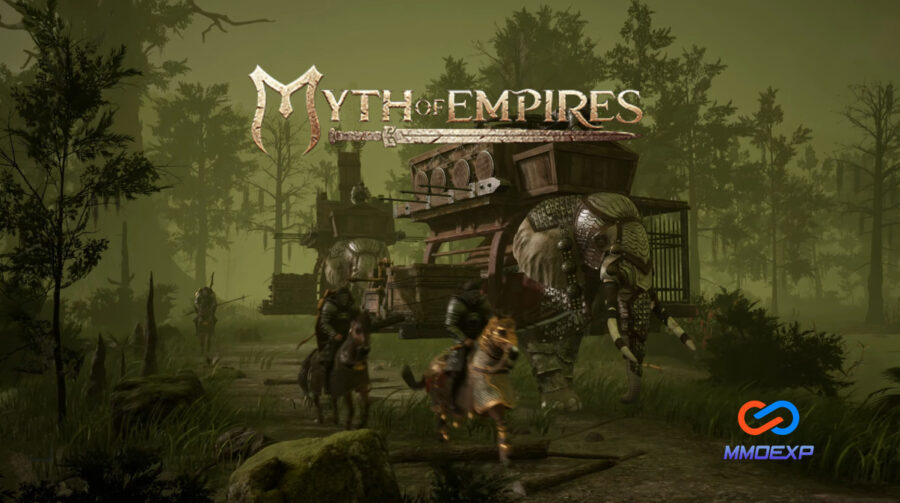
Hello everyone! Today we will delve into the fascinating world of Myth of Empires to explore how to capture and tame slaves. In this exciting game, there are two types of slaves: the passive ones, whom we can tame by giving them what they need, and the aggressive ones, whom we must stun before capturing them. Come with me as I show you both ways to do it.

To begin with, when we encounter a passive slave, we have the option to talk to him and recruit him. In this case, the slave will ask us for something in exchange for joining us. For example, they could request a piece of thick leather armor or even 16 meat skewers. If we have the necessary objects, we simply hand them over and the slave will join our cause. However, if we are not high enough to tame it, we will have to wait to improve our skills before trying again.

On the other hand, when we face an aggressive slave, the situation changes. Instead of talking to him, we must stun him with a club and then tie him with a rope and take him to our base. It is important to note that we must be careful not to inflict excessive damage on him during the stunning process, as we could end up accidentally killing him.

Once captured, we can transport the slave to our base and assign it various tasks. However, it is crucial to make sure we keep him close to our base to prevent him from running away if his health is restored and he falls off the horse we are transporting him on.

As for the slaves we want to train, the process is equally simple. First, we must craft a stick to tie them, then we provide them with food and put them to work. Over time, the slave will level up and improve his skills, which will allow us to customize his function according to our needs. For example, if we want him to become an expert in handling one-handed or two-handed weapons, we simply equip him with the corresponding equipment and let him work.

Additionally, it is important to remember that each slave can perform a maximum of five different tasks, so we must carefully plan how to assign its functions to optimize its performance. At the same time, it is essential to keep them fed and monitored to ensure their effectiveness and loyalty.

In short, capturing and taming slaves in Myth of Empires is a fundamental part of the gaming experience. Whether recruiting passive thralls through item trading or stunning aggressive thralls and then training them, this mechanic adds an extra layer of strategy and customization to the game. With a little planning and patience, we can form a team of efficient and versatile slaves that will help us achieve our goals in the world of Myth of Empires.

Do you need the Myth of Empires Copper Coins buy service, MMOexp will do it for you manually, it is safe and reliable, and you can easily get more MoE Copper Coins, please contact us.

Hidden Riches: Ravendawn Online Mining Guide

Today, we’re delving deep into the world of mining, addressing some concerns from the community about overcrowded mines and scarce nodes. Fear not, fellow miners, because I’ve scoured the lands of Ravendawn and discovered some hidden gems for you. Stick around till the end, as I’ll reveal my favorite super-secret mining spot. Let’s jump right in!

  1. Barandon Mines: The Classic Riches

Our first stop is the well-known Barandon Mines, located north of Raven Crest and east of Margrove. While many of you might be familiar with this spot, it remains a go-to location for mining enthusiasts. The surface of the mine is rich in nodes, and if you venture deeper, you’ll encounter level 35 dwarves, providing both valuable resources and experience points. Don’t forget to grab the house trophy for a bonus to your weapon defense.

Navigating through the mine might be a bit crowded, but follow my route in the article to discover the deeper sections, untouched by many. It’s a contested area, but the rewards are worth the effort.

  1. Goblin Mine on SEO Island: Unearth Goblin Obsessions

Next up is the Goblin Mine on SEO Island, situated southeast of the village. This hidden cave hosts the Goblin Obsessions quest, leading you to face two hobgoblins as you descend. Beyond them, you’ll find nodes waiting to be mined. While not as crowded as other spots, this location offers a unique questing experience, making it a well-rounded choice for adventurers.

  1. Turtle Shell Hills: Balanced Resources

Turtle Shell Hills might not boast the same richness as Barandon Mines, but it compensates with a decent number of nodes. This area is often linked to common-range board tasks, providing an opportunity to accomplish multiple objectives simultaneously. Apart from mining, you can also take on the “Restoring the Natural Balance” quest, involving the CH boss.

  1. Mount Minos in Had Desert: Advanced Mining Adventure

For those seeking a more advanced mining experience, Mount Minos in the Had Desert awaits. With level 33 to 35 minotaurs roaming the area, this spot is not only rich in nodes but also offers a lengthy quest line. The minotaurs drop minor horns, useful for the eighth step of the Hadak Desert artifact journal. It’s a challenging yet rewarding spot for experienced miners.

  1. Super Secret Mining Spot: The Hidden Pirate Docks

Now, for the grand finale, let’s dive into the super-secret mining spot. This hidden gem is located in the middle of the ocean, accessible after completing the SJO Island Chase Eagle quest. Upon completion, the legendary Captain will reward you, unlocking access to the hidden pirate docks on the remote Beach Island near the scattered sea.

Venturing inside the cave, you’ll encounter level 35 poison petals, familiar foes for seasoned adventurers. However, the real treasure lies in the abundance of nodes waiting to be mined. Keep in mind that this secret spot might not stay hidden for long, so make the most of it while you can.

Conclusion: Happy Mining!

And there you have it, fellow miners! A comprehensive guide to some of the best mining spots in Ravendawn Online. I hope this information enhances your mining experience and helps you uncover hidden riches. If you know of any secret spots not mentioned here, share them in the comments below. Let’s create a community of prosperous miners!

For more articles like this, take a look at MMOexp.

Skull and Bones: A Guide to Crafting the Formidable Padul Kang Ship

Welcome to a deep dive into the world of Skull and Bones, where the seas are vast, and the adventures are endless. Your guide through the treacherous waters of this open-world naval game. Today, we embark on a quest to uncover the secrets of the Padul Kang, the mightiest ship in the game.

Setting Sail for Success: Unlocking the Padul Kang Blueprint

In the heart of the vast ocean lies the blueprint for the legendary Padul Kang, the pinnacle of naval engineering in Skull and Bones. To unlock this blueprint, one must first reach the pinnacle of their journey in the game – the Bon rank in Open VA.

Once you’ve attained the esteemed Bon rank, journey to the Codex in the knowledge base. Navigate to the ship section and locate the Padul Kang blueprint. With a simple press of a button, track its location, and behold – the blueprint rests in the distant lands of the East Indies.

Prepare yourselves, for the road ahead is long and perilous. But fear not, for with the right preparations, victory shall be ours.

Preparation: Equipping for the Voyage

Before setting sail towards the East Indies, it’s crucial to make necessary adjustments to your ship and equipment. Customize your ship’s cosmetics for optimal visibility, ensuring you can navigate the seas with ease. Stock up on provisions such as cooked food, water, and repair kits to sustain you on your journey.

Keep a keen eye out for rogue waves that may threaten to engulf your ship. Utilize cooked food for buffs, water for speed boosts, and grilled food for stamina refills to navigate through rough waters unscathed.

The Journey Begins: Collecting Materials

With our ship prepared and supplies stocked, it’s time to embark on our journey to collect the materials required for crafting the Padul Kang blueprint.

Our first destination is the Northwestern Outpost, where we acquire the essential Saltpeter. From there, we venture north to the Sanghat settlement, scouring shipwrecks for Pure Iron deposits along the way.

As we journey onward to the Sunny Capital settlement, we secure additional Shellac, a crucial component for crafting the Padul Kang. Along the route, we gather Ironwood and other materials necessary for our quest.

Gathering Raw Materials: Tracking and Refining

Back at the Codex, we track down the remaining raw materials required for crafting. With precise navigation, we collect Ry, Ironwood, and Rainy, ensuring we have all we need for the crafting process.

Upon gathering the raw materials, we journey to the Refinery to refine our loot. With meticulous care, we refine Ironwood planks, Steel Ingots, and Fine Ry to perfection, readying them for the crafting process.

Crafting the Padul Kang: A Triumph at Sea

At long last, with all materials in hand, we return to the shipyard ready to craft the legendary Padul Kang. With skilled craftsmanship, we assemble the components, forging a vessel of unparalleled power and prowess.

As the Padul Kang takes shape before us, we marvel at its magnificence. Equipped with formidable weaponry and sturdy construction, it is a force to be reckoned with on the high seas.

Conclusion: Seize the Seas with the Padul Kang

With the Padul Kang now under our command, we set sail once more, ready to conquer the seas and vanquish our foes. From its sleek design to its devastating firepower, the Padul Kang is the epitome of naval superiority in Skull and Bones.

So, fellow sailors, heed my words and embark on your journey to unlock the secrets of the Padul Kang. With courage in your heart and wind in your sails, the seas await your conquest. For more of the latest Skull and Bones content here. If and buy Skull and Bones Silver through our website, you will get more discounts.

Unveiling the Power of Arcane Weapons in Elden Ring

Hello fellow gamers, MMOexp here! Today, we embark on a journey through the mystical realm of the Elden Ring to explore five of the most formidable Arcane weapons that promise to leave a lasting impression on your adventures. As we delve into this new series, we’ll uncover the unique attributes and skills that make each weapon a standout choice for your arsenal.

  1. Morgott’s Cursed Sword

Our first contender is Morgott’s Cursed Sword, a curved greatsword that deals physical damage with a passive blood loss build-up. With D scaling in Strength and Arcane and B scaling in Dexterity when fully upgraded, this weapon offers a versatile playstyle. The Ash of War, a swift dash followed by a blood flame explosion, not only damages enemies but also inflicts blood loss, easily staggering foes. Utilizing items like the white Mask helm and Lord of Blood’s Exultation talisman enhances its attack power when blood loss is present, making it a force to be reckoned with.

To obtain Morgott’s Cursed Sword, defeat Morgott the Omen King and trade his Remembrance with Enia at the Roundtable Hold.

  1. Eleonora’s Poleblade

Next up is Eleonora’s Poleblade, a twinblade with innate Bloodloss build-up benefiting from Arcane scaling. Its unique R2 moveset allows for multiple successive attacks, with the option to charge up for increased damage. The flashy Ash of War, a forward leap and spin, deals with quick successive attacks, causing fast blood loss build-up. Synergizing with items like Millicent’s Prosthesis and Rotten Winged Sword Insignia, this weapon becomes a stylish and powerful choice for those who master its moves.

To obtain Eleonora’s Poleblade, defeat Eleonora, the Violet Bloody Finger NPC, at the Second Church of Marika.

  1. Rivers of Blood

The Rivers of Blood, a Katana-type weapon, is our third pick. Dealing both Physical and Fire damage, it showcases better scaling with Arcane than Dexterity. The Corpse Piler Ash of War, a set of fast frontal cone slashes, causes massive blood loss build-up and damage. With its excellent range, this weapon stands out as a powerful Arcane choice, making it a top contender for any Arcane build.

To obtain Rivers of Blood, defeat Bloody Finger Okina near the Church of Repose.

  1. Marais Executioner’s Sword

The Marais Executioner’s Sword combines split Physical and Magic damage, primarily scaling with Strength. Its Ash of War, Eochaid’s Dancing Blade, is a potent single-target damage dealer with a corkscrew motion that continuously deals damage. This weapon synergizes well with items like Thorny Cracked Tear, allowing you to achieve unparalleled levels of damage.

To obtain Marais Executioner’s Sword, defeat Elemer of the Briar at The Shaded Castle.

  1. Mohgwyn’s Sacred Spear

Our final entry is Mohgwyn’s Sacred Spear, a Great Spear-type weapon with a passive blood loss build-up. Dealing Physical and Fire damage, it boasts an incredible Ash of War, Bloodboon Ritual, offering one of the best AoE damage outputs in Elden Ring. Strengthened by items like Flame Grant me Strength and Flame Shrouding Cracked Tear, this weapon is a powerhouse for Strength and Arcane builds.

To obtain Mohgwyn’s Sacred Spear, trade Remembrance of the Blood Lord with Enia at Roundtable Hold.

In conclusion, these five Arcane weapons in Elden Ring showcase the diverse and thrilling possibilities for players seeking unique and powerful choices for their adventures. Whether you prefer swift and flashy moves or a more strategic approach, each weapon on this list brings its distinct flavor to the game. Experiment with these weapons, combine them with the recommended items and embark on a journey that leaves a mark in the mystical world of Elden Ring.

If you’ve enjoyed this content, Keep up to date with MMOexp site for more Elden Ring build guides! And also can buy Elden Ring Runes here!

Page 7 of 10

Powered by WordPress & Theme by Anders Norén