
Tag: OSRS Gold Page 1 of 2

OSRS Guide: How to Get the Uncharged Toxic Trident

In Old School RuneScape (OSRS), magic weapons play a critical role in both PvM and bossing activities. Among the most popular mid-to-high-tier magic weapons is the Uncharged Toxic Trident. Known for its built-in spell, venom effect, and consistent damage output, this weapon has become a staple for players tackling bosses, Slayer tasks, and challenging PvM content.

Whether you’re aiming to farm bosses efficiently or simply upgrade your magic setup, obtaining the Uncharged Toxic Trident is a major milestone in character progression. In this guide, we’ll explain how to obtain the weapon, how to charge it, and why many players consider it one of the most valuable magic weapons before entering late-game content.

What Is the Toxic Trident?

The Toxic Trident is an upgraded version of the Trident of the Seas, offering improved damage potential and the added benefit of venom attacks. Unlike traditional magic weapons, the trident casts a built-in spell that does not require players to manually use runes from their inventory once the weapon is charged.

To wield the Toxic Trident, players must meet the following requirements:

·75 Magic

·Completion of the Regicide quest

·Access to Zulrah, the boss that drops the weapon

One of the key advantages of the Toxic Trident is its ability to inflict venom on enemies. Venom deals escalating poison damage over time, making it especially effective against bosses and monsters with high health pools.

However, when players first obtain the weapon, it often appears as an Uncharged Toxic Trident, meaning it cannot be used in combat until it has been properly charged with resources.

Step 1: Unlock Access to Zulrah

The primary method of obtaining the Uncharged Toxic Trident is by defeating Zulrah, one of the most profitable solo bosses in Old School RuneScape.

Before fighting Zulrah, players must complete the Regicide quest. This quest unlocks access to Zul-Andra, the area where Zulrah resides.

Regicide Requirements

To complete Regicide, players should have the following skills:

·56 Agility

·10 Crafting

·20 Mining

·59 Ranged (recommended for quest combat)

After completing the quest, players can travel to Zul-Andra using the fairy ring code BJS or by charter ship.

Once unlocked, players can begin farming Zulrah for valuable drops, including the Toxic Trident.

Step 2: Defeat Zulrah

Zulrah is a solo boss famous for its complex attack rotations and phase mechanics. The boss alternates between magic and ranged attacks while also applying venom damage to the player.

Because of this, players typically bring a hybrid setup that includes both magic and ranged gear switches.

Tips for Farming Zulrah Efficiently

Here are several tips that can help players defeat Zulrah more consistently:

·Use a Magic and Ranged gear switch setup

·Learn Zulrah’s rotation patterns

·Bring anti-venom potions or a Serpentine Helm

·Practice proper positioning to avoid unnecessary damage

Although the Uncharged Toxic Trident is an uncommon drop, Zulrah remains one of the best money-making bosses in the game. Even without receiving the trident immediately, players can accumulate valuable resources and large amounts of OSRS gold through regular farming.

This makes Zulrah a popular boss for players looking to both earn money and obtain valuable gear upgrades.

Step 3: Buy the Toxic Trident from the Grand Exchange

For players who prefer not to learn Zulrah mechanics, there is an easier alternative: purchasing the Uncharged Toxic Trident directly from the Grand Exchange.

Because Zulrah is frequently farmed, the trident is usually available on the market at a reasonable price compared to endgame raid weapons.

Many players choose to earn OSRS gold through activities such as bossing, Slayer tasks, or Grand Exchange flipping before purchasing upgrades like the Toxic Trident.

Additionally, some players explore online marketplaces that offer OSRS items for sale, allowing them to obtain important gear upgrades quickly. This can help players skip long farming sessions and move directly into higher-level PvM content. As always, players should prioritize account security and follow game rules when considering such options.

Step 4: Charging the Toxic Trident

Once you obtain the Uncharged Toxic Trident, it must be charged before it can be used in combat.

Charging the weapon requires the following items:

·Zulrah’s scales

·Fire runes

·Chaos runes

·Death runes

Each cast consumes a small number of these resources, meaning the weapon requires regular maintenance to remain usable.

The venom effect is automatically applied during combat when the weapon is charged, giving players an additional damage-over-time effect against enemies.

How to Obtain Zulrah’s Scales

Zulrah’s scales can be acquired in several ways:

·Killing Zulrah

·Purchasing them from the Grand Exchange

·Opening Zulrah-related loot drops

Because the weapon continuously consumes scales, maintaining it requires a steady supply of resources. However, the increased damage and venom effect make the investment worthwhile for most players.

Why the Toxic Trident Is So Popular

The Toxic Trident is widely considered one of the most reliable magic weapons for mid-to-late game PvM content.

Players commonly use it for:

·Zulrah farming

·Kraken Slayer tasks

·Chambers of Xeric raids

·Theatre of Blood entry setups

·High-level Slayer monsters

Key Advantages

The weapon offers several powerful benefits:

·Built-in spell that simplifies combat

·High magic accuracy

·Venom damage for increased DPS

·Reliable performance against bosses

Because of these advantages, the Toxic Trident is often one of the first major magic upgrades players pursue before moving on to expensive raid weapons.

Final Thoughts

Obtaining the Uncharged Toxic Trident in Old School RuneScape is a major milestone for players focused on PvM and bossing. The weapon provides strong damage, venom effects, and consistent performance across a wide range of content.

Players can acquire the weapon by defeating Zulrah or by purchasing it directly from the Grand Exchange using accumulated OSRS gold. Some players also explore marketplaces featuring OSRS items for sale to speed up their gear progression and reach high-level content faster.

Whether you earn it through bossing or buy it outright, the Toxic Trident remains one of the most impactful magic weapons available for mid-to-high-level players in OSRS. Its reliability, strong damage output, and venom ability make it an essential tool for tackling some of the toughest challenges in Gielinor.
OSRS Giants Foundry Refinement Guide:Everything You Need to Know

In the expansive world of Old School RuneScape, few skilling mini-games have made as big an impact as Giants Foundry. Tailored for smithing enthusiasts, this activity offers a refreshing twist on traditional training methods. Not only does it provide solid XP gains, but it also delivers a more interactive and engaging experience than smelting bars or hammering at an anvil. One of the core mechanics that sets Giants Foundry apart is the refinement process-a crucial step for producing high-quality weapons and optimizing your rewards.Play smarter, not harder-get OSRS gold with RSgoldfast today and enjoy the game your way!

Giants Foundry is a smithing-focused mini-game where players take on commissions to forge custom weapons from existing metal bars or salvaged equipment. Unlike standard smithing, this process involves following specific requirements-like choosing molds and adjusting heat levels-to create swords tailored to a client specifications.

But while picking the right molds and materials is important, the true heart of the activity lies in the refining phase. This step determines your sword quality, performance, and how much XP you’ll walk away with.

Refining a sword isn’t just about pounding metal-it’s about using the right tool at the right time. Here’s a breakdown of the tools you’ll use and how they impact your forging success:

Forging Hammer

Use:Best for fixing imperfections and tempering your weapon during early-to-mid phases.

Effect:Speeds up progress by 2% and reduces cooldown by 2.5%.

Whetstone

Use:Ideal for sharpening the sword once it hits a moderate heat level.

Effect:Grants 1% forging progress every 2 ticks and increases heat by 1.5%.

Tip:Best used after the hammer to polish the edge. Timing is critical-too early, and you’ll waste heat; too late, and the sword may cool too much.

Polishing Wheel

Use:Final step in the weapon cosmetic and quality polish, used when the blade is cool.

Effect:Adds 1% progress every 2 ticks and reduces cooldown by 1.7%.

Tip:Think of this as the finishing touch. Only use it when your sword has cooled significantly, or you risk damaging it.

Lava Pool

Use:Reheats your sword to continue refinement.

Modes:Offers quick or slow heating depending on your needs.

Tip:Use the quick option if you’re in a hurry, but be cautious-it can easily overshoot the ideal temperature range, especially if you’re not paying attention.

Waterfall

Use:Cools the sword when it’s overheated or after intense sharpening.

Modes:Slow flow for steady cooling; fast flow to rapidly bring temperatures down.

Tip:Use the fast setting when your sword is dangerously hot. Slow cooling can give you more time to plan your next move.

Prefab Storage

Use:Lets you pause your work and resume it later without penalty.

Tip:If you need to log out or leave mid-commission, stash your sword here to continue exactly where you left off.

The ultimate aim in Giants Foundry is to complete your commission with a weapon that’s 100% finished and high in quality. Every tool action contributes to progress and XP, but relying solely on the mini-game for XP gains isn’t the fastest route to 99 Smithing. Still, it’s a great change of pace-and the rewards can be worthwhile.

Key to Success:Keep a close eye on the in-game HUD, which tells you the ideal tool to use based on your weapon condition. Ignoring this guidance can lead to mistakes that reduce the quality of your sword. If the quality drops to zero, you’ll lose the materials and need to start over. Always talk to Kovac to get a new commission if that happens.

Tips for Refining Like a Pro

1.Understand the Tool Cycle:Knowing when and how to rotate between hammering, sharpening, polishing, heating, and cooling will drastically boost your efficiency.

2.Watch the Temperature:Your sword temperature is everything. It determines which tools can be used effectively. Plan ahead to avoid overheating or cooling too early.

3.Experiment with Material Combos:Some metals may forge faster or provide better XP. From beginners to experts, everyone needs RS gold for sale-shop with RSgoldfast today! Don’t be afraid to try out different setups to find your personal favorite.

4.Use the HUD Religiously:The tool hints are there for a reason. Follow them closely, especially when you’re still learning.

Giants Foundry isn’t just another grindy mini-game-it’s one of the more dynamic and interactive ways to train Smithing in OSRS. The refinement process adds layers of depth that reward planning, timing, and a bit of experimentation. While it might not replace blast furnace for pure XP rates, it more than makes up for it in fun and immersion.

If you’re aiming for 99 Smithing and want a fresh way to enjoy the journey, mastering the refinement stage in Giants Foundry might be exactly what you need.

Mmoexp Old School RuneScape: First New Skill in Nearly Two Decades

Old School RuneScape (OSRS) has always balanced on a delicate line-preserving the nostalgic gameplay of 2007 RuneScape while slowly modernizing the experience to stay fresh for veteran and new players alike. For over 20 years, that evolution has typically taken place within the confines of familiar systems. But now, for the first time in nearly two decades, the game introduces a brand-new skill: Sailing-a historic addition that opens up a whole new way to explore the world of Gielinor.

A Historic First: Sailing Sets Sail

Sailing isn’t just any skill-it’s the result of years of community conversation, debate, and polling. After three rigorous community votes, Sailing finally passed with a 71.9% majority, meeting OSRS’s high approval requirement to implement new content. As of June 2025, the skill has entered its alpha testing phase, and members can try it now on PC clients through special sailing alpha worlds.

Although it’s not yet available on mobile, this marks a major milestone in OSRS history. Players can explore a sea-based gameplay experience unlike anything the game has ever featured. This is more than a skill-it’s an entirely new system that adds exploration, ship management, cooperative mechanics, and oceanic challenges.

How to Join the Sailing Alpha

To participate, you’ll need to be an OSRS member and log into one of the dedicated Sailing alpha worlds, which place you right in Port Sarim with all the tools you need to start your nautical journey. This testing phase is strictly capped at level 30, and any progress or items earned in the alpha will not carry over to your main account. Think of it as a sandbox designed to showcase and test sailing’s core systems.

What You Can Do in the Sailing Alpha

Even though many features are unfinished or placeholders, Jagex has included a surprisingly robust set of mechanics for the alpha:

Opening Quest: Learn the basics of ship control, navigation, and the oceanic UI.

Customizable Ships: Players can obtain their vessel and upgrade it using salvaged materials, better hulls, sails, and onboard stations.

Open Waters Exploration: Travel between ports, discover new islands, and log entries in your Captain’s Log.

Resource Salvaging: Dredge the ocean floor for materials and gear, a key part of progressing your ship and skills.

Group Sailing: You can sail solo or team up with others. Up to 25 ships can appear on screen at a time, allowing for epic multiplayer voyages.

The Barracuda Trial (Level 30): A time-trial gauntlet full of whirlpools and hazards. It’s the alpha’s big test of player mastery.

Jagex is especially eager to receive player feedback about the ship handling, island generation, and balance of shipbuilding mechanics, all of which will evolve significantly before the full skill releases.

Why Sailing Matters

Introducing a new skill into Old School RuneScape is no small feat. The game hasn’t seen a 24th skill since its inception, and players are notoriously cautious (and rightly so) about anything that might upset the balance or pacing of OSRS’s core experience.

But Sailing is different. Rather than just being a grind-to-99 stat, it’s a gameplay loop, almost like a miniature game inside the game. It’s about navigating, exploring, managing your vessel, and engaging with the world in a new, layered way. It draws from the spirit of OSRS while modernizing how players engage with content.

And unlike other skills that happen in isolated areas-like mining in a quarry or cutting trees in a forest-sailing ties the world together. You sail between newly explorable sea zones, embark on nautical quests, and chase discoveries that are genuinely unique to the skill.

Community Reaction and What’s Next

The response so far has been overwhelmingly positive. Many long-time OSRS players were skeptical that sailing could ever be implemented without ruining the game’s feel. But the alpha shows promising potential. The simplified controls, stylized graphics, and custom ship design all fit snugly into the Old School aesthetic.

Jagex has stated that this alpha is the first of multiple testing phases, and that they’ll refine every system-exploration, combat, progression, and multiplayer sailing-based on how players interact with it. The alpha will run for one week, and feedback is being actively collected across official forums and social media.

Sailing Into the Future of OSRS

Whether you’re a PvMer, a skiller, or just someone who loves exploring new systems, sailing feels like a real evolution. Not only does it revive the excitement of learning something new in OSRS, but it also opens the door for even bolder content in the years ahead. Imagine player-owned naval expeditions, fishing on the open sea, sea monster hunting, or cross-continental trading. With sailing as the foundation, OSRS’s world just got a lot bigger.

Ready to Hoist the Sails?

Old School RuneScape is free to download on Steam, and with cross-platform progression on PC, iOS, and Android, you can take to the seas wherever you are.

If you’re looking to gear up for the journey or invest in your character, consider checking out MMOexp, a trusted source for affordable OSRS gold and OSRS items, perfect for stocking your ship, upgrading your gear, or preparing for the challenges ahead. With competitive pricing and fast delivery, MMOexp ensures you’re always ready to sail into the next adventure.

OSRS King Ransom Quest: Essential Items & Preparation Guide

The King Ransom quest in Old School RuneScape is an important milestone, granting access to the powerful Piety prayer. This prayer significantly enhances melee combat stats, making it a must-have for serious players. Completing this quest involves puzzles, combat, and strategic navigation. To ensure a smooth experience, proper preparation is key. Don’t let gold grinding slow you down – get OSRS gold instantly at unbeatable prices, only at RSgoldfast! Below is a detailed list of essential items that will help you efficiently complete King Ransom.

Recommended Items for the Quest

  1. Teleportation Items

Efficient travel is crucial for completing King’s Ransom quickly. Here are the best teleportation options:

Camelot Teleport – Allows quick access to Camelot Castle, where much of the quest takes place. Requires Level 45 Magic, 1 Law Rune, and 5 Air Runes.

Fairy Ring Access (Code CJR) – Using a Dramen Staff or Lunar Staff, players can quickly travel near quest-related areas.

Salve Graveyard Teleport – Useful for reaching the Salve Graveyard without unnecessary detours. This teleport is available through Arceuus Spellbook or by using a charged Salve Amulet.

Ardougne Teleport – Having this on hand makes accessing Ardougne and the Black Knight Fortress much easier. It requires 2 Law Runes and 2 Water Runes (or the Ardougne Cloak teleport).

  1. Accessory Items

Certain items will facilitate key parts of the quest:

Battle Bracelet or Amulet of Glory – Either of these will allow easy entry to the Black Knight Fortress. The Amulet of Glory also provides additional teleports.

Lockpick (Optional) – While not mandatory, having a lockpick can be useful for navigating certain locked areas.

  1. Combat & Survival Gear

Since King’s Ransom includes combat encounters, preparing adequate gear is important:

Melee Setup: If you’re planning to use melee, bring a decent weapon (e.g., Dragon Scimitar) and armor like Rune, Dragon, or Barrows gear.

Magic or Ranged Setup: If using magic, ensure you have high-level spells prepared, such as Fire Wave. For ranged, bring Rune Crossbow with Broad Bolts or better.

Food & Potions: Bring high-healing food (Sharks, Karambwans, or better) and potions (Super Attack, Super Strength, and Prayer Potions).

  1. Puzzle Assistance Items

King’s Ransom features a few puzzle challenges that require problem-solving skills. While no specific items are required, it helps to have:

A Quest Guide or Notes – If you struggle with puzzles, keeping a guide handy can save time.

Energy or Stamina Potions – Helps with running between locations, especially if agility levels are low.

Additional Preparation Tips

Complete Prerequisite Quests: Make sure you’ve finished Merlin’s Crystal and Holy Grail before starting King’s Ransom.

Check Your Combat Levels: While the quest isn’t overly combat-heavy, having at least 60+ combat stats makes fights easier.

Be Ready for the Knight’s Training Grounds: After the quest, you’ll gain access to Piety, but you’ll need to complete a combat training section. Bring proper gear to finish this efficiently.

King’s Ransom is a rewarding quest that unlocks one of the most valuable prayers in OSRS. By preparing with the recommended teleportation items, combat gear, and support tools, you can complete the quest efficiently and unlock Piety without unnecessary difficulty.

In summary, the King’s Ransom quest is a cornerstone of gameplay in OSRS, primarily due to the powerful Piety prayer it unlocks.What are you waiting for? Upgrade your OSRS journey with affordable cheap RS gold from RSgoldfast. Instant delivery and secure transactions guaranteed! By preparing with the recommended items — Adonie Teleport, Camelot Teleport, Battle Bracelet or Amulet of Glory, Dramen/Lunar Scepter, and Salve Graveyard Teleport — players can enhance their questing experience.

How to Get to Yanille in OSRS

Yanille is a town in Old School RuneScape (OSRS) located to the south of Ardougne and to the west of the Wizards’ Tower. It is an essential location for a variety of reasons, particularly for completing certain quests, training skills, and accessing the ZGS (Zgs) for high-level bosses. For new players or those who are unfamiliar with the game world, reaching Yanille may seem a bit tricky at first. However, with the right knowledge of travel methods, it’s relatively easy to access this important location.

In this guide, we will cover various methods of getting to Yanille in OSRS gold, including teleportation methods, transportation, and essential in-game landmarks that will make your journey faster and more efficient.

Why Should You Visit Yanille?

Before we dive into how to reach Yanille, let’s briefly discuss why this town is worth the visit. Yanille is known for a few key features:

Questing: Several important quests in OSRS involve Yanille. One notable quest is the “Missing, Presumed Death” quest, which is crucial for those pursuing the Master Quest Cape. The “Hunt for Red Rakhshasa” also requires visiting Yanille.

Training Facilities: Yanille houses the Agility Arena, which is a key training ground for improving your Agility skill. The Arena itself is located just north of the town and offers great rewards for completing the different Agility challenges.

Wizards: Yanille is home to the Yanille Wizards’ Guild, a major hub for Wizards in the game. The Guild is important for high-level magic training and quests.

Teleportation Access: Several methods of fast teleportation to and from Yanille are available, which makes it a popular destination for players with high-level magic skills.

How to Get to Yanille in OSRS

Now, let’s take a look at all the ways you can reach Yanille in OSRS. There are multiple transportation methods available, including walking, teleportation, and using in-game transport services.

1. Walking to Yanille

The most basic method of getting to Yanille is to simply walk there. Here are the directions:

Starting from Ardougne:

From Ardougne, travel south and slightly west.

Continue walking until you reach the gates of Yanille, which are clearly marked by large stone walls and a clear path leading to them.

This method is free and doesn’t require any special items, but it can be quite slow. If you’re in no rush and want to take in the sights of the world, walking is a good way to get to Yanille. However, there are more efficient methods of travel, especially for those who want to save time.

2. Teleportation Methods

There are several teleportation methods that can take you directly to Yanille or nearby areas, making your journey much faster. These teleportation methods generally require a certain level of Magic skill or the completion of specific quests.

Amulet of Glory (Edgeville Teleport)

One of the easiest and most commonly used teleportation methods is the Amulet of Glory. This amulet has a teleportation option to Edgeville, which is close to Yanille. Once you teleport to Edgeville, it’s a short walk south to reach Yanille.

How to Use: Equip an Amulet of Glory and use the teleport option to Edgeville.

Magic Level: Requires 50 Magic to equip.

Effect: Teleports you to Edgeville, from where you can walk south and slightly west to reach Yanille.

This teleportation method is ideal for players who already have the Amulet of Glory equipped, as it allows you to quickly access the location while still being efficient.

Teleport to Ardougne

If you are in Ardougne, you can simply use the Ardougne Teleport spell to quickly access the city. Once there, travel slightly to the south and west to reach Yanille. The Ardougne Teleport spell requires 51 Magic to cast and takes you to the center of Ardougne, which is relatively close to Yanille.

How to Use: Cast the Ardougne Teleport spell, which teleports you to Ardougne.

Magic Level: Requires 51 Magic.

Effect: After teleporting to Ardougne, walk south and slightly west to reach Yanille.

Kharyrll Teleport (Via the House)

For players who have completed the Desert Treasure quest, you can use the Kharyrll Teleport to reach The House of Kharyrll located just north of Yanille. After teleporting to this location, walk slightly south to reach the gates of Yanille.

How to Use: Use the Kharyrll Teleport spell after completing Desert Treasure.

Magic Level: Requires 70 Magic to use this teleport.

Effect: After teleporting to the House of Kharyrll, you need to walk south to reach Yanille.

This teleportation method is particularly useful for players who want to access Yanille quickly from Desert locations.

Lunar Spellbook: Teleport to Moonclan Isle

For players who have completed the Lunar Diplomacy quest, you can use the Lunar Spellbook and the Teleport to Moonclan Isle spell to reach a place near Yanille. From here, simply head south to reach Yanille.

How to Use: Switch to the Lunar Spellbook and cast the Teleport to Moonclan Isle spell.

Magic Level: Requires 91 Magic.

Effect: Teleports you close to Yanille. You must then walk south.

This method is perfect for players who are heavily invested in magic and have completed the Lunar Diplomacy quest.

3. Using the Agility Arena (For Agility Trainers)

One unique feature of Yanille is the Agility Arena, which is an area dedicated to improving your Agility skill. The arena is located just north of the town, and it is the primary destination for players looking to train their agility in OSRS. The Agility Arena also provides rewards in the form of tickets that can be exchanged for various items.

If you’re already in the Agility Arena and looking to continue training, you can easily reach Yanille by using any of the previously mentioned methods, including walking or teleporting. The Agility Arena is connected to the town, making it a popular hub for Agility trainers.

4. Using the Yanille Bank Chest (Accessible for Questing)

Yanille is also home to one of the most important locations for players working on quests. As part of questing, you will need to access the Yanille Bank Chest. This is typically part of quests like the “Missing, Presumed Death” quest, where you need to interact with various NPCs within the town.

Once you are inside the town, you can also use the Yanille Bank Chest to store and withdraw items. This is particularly useful when completing quests, especially if you need access to specific items or if you’re planning on spending a significant amount of time in the area.

5. Other Alternative Travel Methods

In addition to the previously mentioned teleportation methods, there are a few other methods you can use to get close to Yanille. These include:

Charter Ships: For players who have access to Charter Ships, there are routes that go to Ardougne, from where you can easily walk to Yanille.

Teleportation via Fairy Rings: For players who have unlocked the Fairy Ring network, the fairy ring code CJR will take you to the Yanille area, making it an ideal method for players with access to this system.

Conclusion

Getting to Yanille in cheap RuneScape gold is relatively straightforward, with multiple methods available depending on your Magic level, your quest progress, and your preferred style of travel. Whether you are looking to complete important quests, train your Agility, or access the Wizards’ Guild, Yanille is a vital town that every player should become familiar with.

The methods outlined above, from teleportation spells to walking, provide you with a variety of options to access this important location. Whether you use an Amulet of Glory for quick travel or walk from Ardougne, you’ll be sure to reach Yanille and continue your journey through the world of Gielinor with ease.

OSRS: The Quick Guide to Profitable Chaos

In Old School RuneScape (OSRS), making large sums of gold is often a combination of knowing the right spots, the right tools, and, of course, timing your actions perfectly. While the journey to 40 million OSRS gold may sound like a long one, some methods allow for big rewards in an incredibly short amount of time. In this guide, we’ll walk you through how to make 40 million in less than a minute—yes, you read that right—using a clever trick that combines the power of item drops, boss mechanics, and a little bit of precision.

Requirements

Before we jump into the specifics of the method, let’s take a quick look at the essentials you’ll need to execute this strategy successfully.

One of These: Dragon Warhammer
The Dragon Warhammer is one of the most powerful weapons for dealing damage in OSRS, especially when you need to break through a boss’s defenses. You’ll need this item to make quick work of the boss in question. Its special attack, the Smash, lowers a target’s Defence, making it easier to hit high damage in subsequent attacks.

    A Few of These: Bolt Racks (or other high-damage bolts)
    High-damage bolts, like the Ruby bolts (e) or Amethyst bolts, will do the heavy lifting when it comes to quickly chipping down a boss’s HP. The ruby bolts are especially useful with their special effect, which can hit critical damage that boosts your profits substantially.

    Almost Certainly One of These: Arcane Spirit Shield or an Equivalent
    While not mandatory, having a shield with high defensive bonuses like the Arcane Spirit Shield is recommended for protecting yourself against any potential damage, especially from the boss you’ll be encountering. It also offers good Prayer bonuses to help you stay alive longer.

    Preparation Time
    In this method, you won’t need long. Your goal is to deal with the boss in record time, so the right gear setup and knowing your tiles are essential.

    The Setup

    The magic of this method lies in the timing and the boss you’re going to take on. Here’s a step-by-step breakdown of what you need to do.

    Head to Calvon
    First, you’ll need to get to Calvon. This is a hidden, not-so-obvious spot where an easy-money boss resides. The exact location will need some scouting, but once you get there, it’s all about positioning.

      Stand on This Exact Tile
      After you’ve arrived, position yourself on the exact tile indicated. This is crucial; standing in the right spot allows you to catch the boss off-guard and initiate the fight with maximum efficiency.

      Wait for the Boss to Show Up
      Now, all you need to do is wait. Don’t rush! The boss will appear in due time, and this is where the setup gets interesting. When the boss spawns, be sure to block any other players who might try to get in the way. This will keep you as the only target, allowing you to focus all your efforts on taking him down.

      Execution: The Fastest Kill in OSRS

      Once the boss spawns, your task is to defeat him as quickly as possible. Here’s how you do it:

      Splash the First Time
      On the first attack, don’t worry too much if you miss. This is a tactical move, designed to allow you to build up your next hit’s power. While your first attack may “splash,” this sets up the perfect window to land your subsequent hits more accurately.

        Land the Second Hit
        After your splash, make sure to follow up with a quick, powerful hit. If you’re using Ruby bolts (e), this is when you’ll see some massive numbers fly. With the special attack procs from the bolts, you’ll start dealing substantial damage on the second hit.

        Set Time to 5 Minutes
        Setting a five-minute timer might seem like a small detail, but it’s important. It’s not just about killing the boss; it’s about how fast you can do it while keeping an eye on your timer. Five minutes is all you need to get the job done efficiently. Make sure you’re prepared to entangle your opponent if they try to run, and keep up the pressure.

        Drop the Entangle Bolt
        After the initial hits, it’s time to drop the Entangle Bolt. The Entangle bolt ensures that the boss can’t escape, giving you an additional window to hit him with full force. From here, it’s all about maintaining the pressure with your attacks.

        Give Him the Karassi Whack
        Now’s the fun part. You’ll want to hit him with a Karassi Whack from hell, which is exactly how it sounds. Using a Karasi sword (or similar high-damage melee weapon) will give you the chance to hit with devastating force. Ideally, you want to land this attack at just the right moment, combining it with your powerful range hits.

        Bolt His Bollocks Off
        If the Karassi doesn’t finish the job, it’s time to bring in your last resort: Ruby bolts (e) or another high-damage bolt. With their special ability, they’ll hit hard, often dealing massive damage in one go. If the boss is still standing after the Karassi, you should be able to finish him off in no time.

        50 and Beyond
        The moment you hit that sweet 50 damage mark, the boss should be on his last legs. If you’re following this method and using all your available tools efficiently, you should be able to get the boss down to zero HP before he has a chance to react.

        The Final Blow: Spec and AGS for the Win

        Now, you’re almost there. With only seconds left before the boss dies, you’ll want to spec with a God Sword (AGS is ideal) to land that last blow with maximum damage. The AGS Special Attack, “The Godsword Smash,” will add additional power and ensure a fat loot drop.

        The beauty of this method is that the 40 million loot you’re after doesn’t just come from one lucky hit. It’s a combination of high-powered weapons, strategic timing, and good old-fashioned precision. The loot drop from the boss should reward you with a hefty amount of RuneScape gold, and once you’ve done it once, you can replicate the strategy again and again, netting massive profits in almost no time at all.

        Conclusion: The Bamboozling Boss Battle

        In conclusion, making 40 million in less than a minute in OSRS is not only possible, but it’s a strategy that requires careful planning, the right equipment, and a dash of luck. The beauty of this method is that it works best for players who are comfortable with bossing, have access to the required gear, and can keep their cool under pressure. Whether you’re using the Dragon Warhammer to break defenses, hitting the boss with powerful bolts, or finishing him off with a Karassi sword and AGS spec, the process is all about efficiency.

        Just remember: this method isn’t for the faint of heart, and it requires a good knowledge of boss mechanics, gear setups, and an understanding of the best possible tactics. But once you’ve mastered it, you’ll find that making 40 million in mere minutes can become a regular, profitable strategy.

        Old School RuneScape: Smithing 1-99 Leveling Guide

        Smithing is one of the most classic and rewarding skills in Old School RuneScape (OSRS). Whether you’re crafting high-level gear, earning OSRS gold through bars and ores, or simply working toward the prestigious 99 Smithing cape, this skill is an integral part of the game’s economy. The skill allows players to create a wide array of items, including weapons, armor, and tools, making it valuable both for combat and for making money. However, reaching level 99 Smithing can be a daunting task, especially with the high costs and significant time investment required.

        This guide will break down the most efficient and profitable methods for training Smithing from level 1 to 99, along with tips on how to make the process more affordable or enjoyable depending on your preferences.

        1. Smithing Basics

        Smithing in OSRS revolves around using ores to create metal bars and then shaping these bars into various items using anvils and furnaces. The process is essential for creating a range of useful items like armor, weapons, and tools. Smithing requires ores such as copper, tin, iron, coal, gold, mithril, adamantite, and rune, with each level of Smithing unlocking new, stronger, and more profitable items.

        The skill itself can be quite resource-heavy, as it requires a significant number of ores and bars. However, with careful planning and choice of methods, Smithing can also be relatively profitable in certain circumstances.

        To train Smithing, players must visit a furnace and anvil, both of which are widely available in the game. The Smithing experience (XP) gained depends on the type of bar smelted and the item created.

        2. Leveling Smithing: Methods and Training

        Levels 1–15: Bronze and Iron Bars

        When you first begin Smithing, you will need to start with the most basic ores: copper and tin. These ores are gathered through mining and are used to create bronze bars. At level 1 Smithing, the fastest way to train is to smelt these ores at a furnace, combining one copper ore and one tin ore to create one bronze bar.

        Bronze bars: Smelting one copper ore and one tin ore at a furnace gives you 6.25 XP.

        Experience per bar: 6.25 XP

        To speed up your training and reach level 15 faster, you can start by making bronze bars and then later transition into iron bars once you unlock iron ore at level 15.

        Levels 15–29: Iron Bars and Steel Bars

        Once you reach level 15, you can start making iron bars. These bars require iron ore, and smelting them provides more experience than bronze bars. At level 15, you will want to smelt iron ore into iron bars, which gives you 12.5 XP per bar.

        However, at level 30 Smithing, you unlock steel bars. Steel bars require coal and iron ore in a 1:1 ratio. This is slightly more resource-intensive, but it also yields more experience per bar and faster experience rates compared to iron bars.

        Iron bars: 12.5 XP per bar.

        Steel bars: 17.5 XP per bar.

        Steel bars will be your main focus for training from level 30 onwards until you reach higher levels and unlock more profitable bars.

        Levels 29–99: High-Level Smithing Methods

        As you progress through Smithing, the XP per bar increases, but the cost of training also escalates. The most popular training methods for Smithing at higher levels involve crafting items such as mithril, adamantite, and rune bars into armor and weaponry. However, some methods are more resource-efficient than others, depending on your goals—whether you’re focusing on making money or maximizing experience gain.

        Levels 29–99: Mithril and Adamantite Bars

        Once you reach level 40 Smithing, you can start working with mithril bars. Mithril bars require mithril ore and coal, similar to steel bars, but they offer better experience rates. At level 30, you can create mithril full helms, which provide relatively good experience and offer decent cost efficiency.

        Once you hit level 70 Smithing, you can begin crafting adamantite bars, which are the best way to train Smithing through crafting high-level items until level 99. Adamantite bars are crafted with adamantite ore and coal.

        Mithril bars: At level 50 Smithing, you can begin making mithril platebodies. The Mithril Platebody is a great item to craft for both XP gain and money-making purposes.

        Adamantite bars: With adamant bars, smith Adamant Platebodies for better XP rates.

        Levels 89–99: Rune Bars and Dragon Equipment

        When you reach level 89 Smithing, you unlock the ability to create rune bars. Rune bars require rune ore, and crafting rune equipment can yield massive experience points. However, this method can be very expensive, making it viable mostly for those who want to achieve 99 Smithing quickly.

        At level 99,Dragon Platebodies are available, but they are generally not recommended for efficient XP gain due to the high resource costs.

        3. Alternative Smithing Methods

        Blast Furnace: One of the best ways to train Smithing from level 30-99 is through the Blast Furnace. The Blast Furnace uses the same materials as the regular furnaces but is much more efficient. This method requires a higher initial investment (especially for the Coal Bag and necessary equipment), but it allows you to smelt ores at a much faster rate, saving time and improving XP rates. You can use the Blast Furnace for steel, mithril, adamantite, and rune bars, among others.

        Superheating: If you want to combine Smithing with Magic training, you can use the Superheat Item spell to smelt ores into bars while gaining both Smithing and Magic experience. This method is typically slower than traditional furnace-based methods but is useful for people who want to train multiple skills at once.

        4. Making Smithing Profitable

        While Smithing is generally resource-heavy and requires considerable investment, there are ways to make the skill profitable. The most notable ways to do this include:

        Making bars for profit: Smithing bars like steel bars and mithril bars can yield decent profits if sold in bulk to other players.

        Smithing high-value items: Crafting high-demand items like Rune Platebodies and Dragon Platebodies can bring in substantial profits. However, these items are costly to craft, so it’s essential to weigh the profit margins carefully.

        5. Tips and Tricks for Efficient Smithing

        Use a charged Amulet of Glory to teleport to edgeville, where you can access the furnace and anvil in close proximity.

        Use the Family Crest gloves to save on coal, reducing the number of ores needed for smithing.

        Utilize the Blast Furnace for higher XP rates and lower resource usage.

        6. Conclusion

        Training Smithing from level 1 to 99 in OSRS requires dedication, patience, and planning. Choosing the right methods based on your goals—whether for cheap RuneScape gold, experience gain, or both—will ultimately determine your approach to this skill. By following this guide, you will be able to streamline your Smithing training and achieve your goal of reaching level 99 more efficiently, saving time and resources along the way. Whether you’re aiming for the iconic 99 Smithing cape or simply need to craft high-end gear, this skill will remain an important part of your OSRS journey.

        Old School RuneScape: Runecrafting 1-99 Leveling Guide

        Runecrafting is one of the most challenging yet rewarding skills in OSRS gold. It allows players to create runes, which are essential for casting spells in the Magic skill. Training Runecrafting to level 99 is a significant accomplishment, as the skill is known for its slow experience rates and tedious methods. However, with proper planning, dedication, and efficient training techniques, reaching level 99 Runecrafting can be both achievable and profitable.

        This guide provides a step-by-step breakdown of the best methods to train Runecrafting from level 1 to 99. Whether you’re a free-to-play (F2P) player or a member, this guide covers various strategies to suit different playstyles and goals.

        Why Train Runecrafting?

        Runecrafting offers several benefits that make it worthwhile, including:

        Profitability: At higher levels, Runecrafting can generate significant income, especially when crafting high-level runes like Nature, Blood, and Wrath Runes.

        Skillcape Prestige: The Runecrafting skillcape is a symbol of perseverance, as it’s considered one of the most difficult skillcapes to obtain.

        Essential for Magic: Runecrafting provides a steady supply of runes for Magic training, saving money and ensuring self-sufficiency.

        1-99 Runecrafting Leveling Guide

        Levels 1-9: Crafting Air Runes

        Method: Craft Air Runes at the Air Altar in Falador.

        XP Rate: ~1,000-2,000 XP per hour.

        Materials Needed:

        Rune Essence or Pure Essence.

        Air Talisman or Tiara.

        Steps:

        Mine or buy Rune Essence.

        Use the Air Talisman to locate the Air Altar near Falador.

        Craft Air Runes by using Rune Essence on the altar.

        Tips: Completing the Rune Mysteries quest is mandatory to unlock Runecrafting and access the altars.

        Levels 9-14: Crafting Earth Rune

        Method: Craft Earth Runes at the Earth Altar in Varrock.

        XP Rate: ~2,500 XP per hour.

        Materials Needed:

        Rune Essence or Pure Essence.

        Earth Talisman or Tiara

        Steps:

        Gather materials and travel to the Earth Altar near Varrock.

        Craft Earth Runes and bank them or sell them.

        Tips: This method is straightforward and sets the stage for faster XP methods.

        Levels 14-23: Crafting Fire Runes

        Method: Craft Fire Runes at the Fire Altar in Al Kharid.

        XP Rate: ~4,000 XP per hour.

        Materials Needed:

        Rune Essence or Pure Essence.

        Fire Talisman or Tiara

        Steps:

        Bring essence and a Fire Talisman to the Fire Altar.

        Craft Fire Runes and repeat.

        Tips: This is the fastest method available at this level range.

        Levels 23-44: Crafting Lava Runes (Members Only)

        Method: Craft Lava Runes at the Fire Altar using a Binding Necklace.

        XP Rate: ~20,000 XP per hour.

        Materials Needed:

        Pure Essence.

        Binding Necklace.

        Fire and Earth Talismans.

        Steps:

        Use Pure Essence at the Fire Altar with a Binding Necklace.

        Combine Fire and Earth Runes for Lava Runes.

        Tips: This method is faster than crafting elemental runes individually. Bring multiple Binding Necklaces to avoid running out.

        Mid-Level Runecrafting (44-77)

        Levels 44-77: Crafting Nature Runes

        Method: Craft Nature Runes using the Abyss or the Fairy Ring system (if available).

        XP Rate: ~9,000-20,000 XP per hour.

        Profitability: Moderate profit depending on rune prices.

        Materials Needed:

        Pure Essence.

        Nature Talisman or Tiara.

        Steps:

        Use the Abyss for faster access to the Nature Altar.

        Craft Nature Runes with Pure Essence and bank them.

        Tips: Equip weight-reducing gear like Graceful to optimize running efficiency.

        Alternative: Crafting Astral Runes (Members Only, Level 82 Required)

        Method: Craft Astral Runes on Lunar Isle.

        XP Rate: ~25,000 XP per hour.

        Profitability: High.

        Steps:

        Unlock Lunar Diplomacy to access the altar.

        Craft Astral Runes with Pure Essence.

        Tips: This method is less click-intensive compared to Nature Runes and more profitable.

        High-Level Runecrafting (77-99)

        Levels 77-90: Crafting Blood Runes (Members Only)

        Method: Use the Arceuus Blood Altar on the continent of Zeah.

        XP Rate: ~35,000 XP per hour.

        Profitability: Very high due to Blood Rune demand.

        Requirements:

        100% Arceuus House favor.

        Pure Essence.

        Steps:

        Travel to the Blood Altar in Arceuus.

        Craft Blood Runes using Pure Essence and bank them.

        Tips: Bring stamina potions to sustain running.

        Levels 90-99: Crafting Wrath Runes

        Method: Craft Wrath Runes at the Wrath Altar on Mount Karuulm.

        XP Rate: ~50,000 XP per hour.

        Profitability: Extremely high.

        Requirements:

        Completed Dragon Slayer II quest.

        Pure Essence.

        Steps:

        Use Pure Essence at the Wrath Altar.

        Bank or sell the crafted Wrath Runes.

        Tips: Use teleports to reduce travel time.

        Alternative Training Methods

        Guardians of the Rift (Minigame, Members Only)

        Overview: A Runecrafting minigame that provides both XP and rewards.

        XP Rate: ~30,000-60,000 XP per hour (scales with level).

        Profitability: Can yield valuable rune rewards.

        Tips:

        Bring weight-reducing gear.

        Focus on portal optimization during gameplay.

        Crafting Combination Runes

        Overview: Create combination runes like Mist, Dust, or Lava Runes.

        XP Rate: ~20,000 XP per hour.

        Profitability: Moderate but requires specific talismans.

        Tips: Use a Binding Necklace to ensure success.

        Tips for Efficient Runecrafting Training

        Optimize Bank Runs: Use teleports, stamina potions, and weight-reducing gear like the Graceful Set to minimize downtime.

        Use the Abyss: The Abyss significantly speeds up training by reducing travel time to altars.

        Unlock Pouches: Complete the Abyss miniquest to unlock pouches, which allow you to carry more essence and increase XP rates.

        Monitor Rune Prices: Profitability depends on market demand. Keep an eye on the Grand Exchange to sell runes at peak prices.

        Quests for XP: Complete quests like Eyes of Glouphrie and Enter the Abyss for bonus Runecrafting XP.

        Runecrafting Milestones and Goals

        Level 44: Nature Runes become profitable.

        Level 54: Access to Law Runes.

        Level 65: Access to Death Runes.

        Level 77: Blood Runes become an efficient training method.

        Level 90: Wrath Runes unlock, offering top-tier profitability.

        Conclusion

        Runecrafting from level 1 to 99 in buy RS gold is a challenging but rewarding journey. With efficient training methods, proper preparation, and patience, you’ll not only achieve the prestigious 99 Runecrafting skillcape but also generate significant profits along the way. Whether you focus on traditional methods like crafting runes at altars or explore alternative options like Guardians of the Rift, this guide provides a roadmap to success. Good luck, and may your essence always be pure!

        Unlocking the Secrets of an OSRS Money Maker: Flatpack Furniture

        In the ever-evolving world of Old School RuneScape (OSRS), finding a unique OSRS Gold making method can feel like searching for a needle in a haystack. As a player who has long desired to discover a lucrative, underutilized money maker, I embarked on a quest to unearth something truly original. My journey led me to a surprising discovery involving flatpack furniture, a niche area that few players have explored to its full potential.

        The Quest for the Elusive Money Maker

        For as long as I can remember, I’ve been on a quest to find a money-making method that no one else was exploiting. The reason behind this is simple: when you’re the only one with a unique money maker, you can set your prices. This was vividly illustrated during the Dead Man Mode where I witnessed a player selling snakeskin boots for 50,000 GP each. Similarly, in Fresh Start Worlds, a player with the unique ability to craft glories was selling them for 300,000 GP each. The demand was so high that players were willing to pay exorbitant prices to avoid the hassle of obtaining these items themselves.

        This principle was further reinforced when I successfully sold a Mirror Shield, which was available at Slayer shops, for an astounding 555,000 GP. It was a perfect example of how having a rare and sought-after item can lead to remarkable profits.

        Discovering the Potential of Flatpack Furniture

        My journey took an unexpected turn when I stumbled upon a forum post discussing flatpack furniture. The post mentioned how high-level items in this category were rarely traded on the Grand Exchange (GE), making them a potential goldmine for those willing to invest. Scully Bones, a fellow player, mentioned their appreciation for flatpack furniture and how it could be a lucrative niche. The comment that piqued my interest was from Rap Frick, who shared their experience of trying to buy an item worth 18,000 GP but ended up offering 210,000 GP due to a lack of sellers.

        This revelation made me realize that flatpack furniture might be the key to discovering an exclusive money-making method. I decided to test the waters and invest in creating Guilded flatpack furniture, which seemed to be in demand.

        The Experiment Begins

        Excited by the potential, I set out to test my hypothesis. I purchased all the necessary supplies to create five Guilded flatpack furniture items, each costing 137,000 GP to make. I listed them on the GE for 198,000 GP each, hoping to see if there was indeed a market for these items.

        To my astonishment, the items sold almost instantly, but for an even higher price—247,000 GP each. This was a 110,000 GP profit per item, which was an incredible return for such a short amount of work. Encouraged by this success, I quickly gathered more supplies and repeated the process with similar results.

        Scaling Up the Operation

        Realizing that this money-making method had significant potential, I decided to scale up my operation. I invested 51.3 million GP into supplies to produce a large batch of items. My goal was to create six types of flatpack furniture: Guilded Dressers, Wardrobes, Clocks, Mahogany Toy Boxes, Treasure Chests, and Armor Cases.

        The production process was intense. I created approximately 120 of each item, accumulating 354,000 free construction XP in the process. After completing the batch, I faced the daunting task of listing these items on the GE.

        The Waiting Game

        As expected, listing such a large quantity of items required patience. The market for flatpack furniture was not as fluid as I had hoped. The GE prices initially valued my 51 million GP investment at only 16 million GP. Despite this, I decided to list the items with a healthy profit margin:

        • Guilded Dressers: 23.2 million GP
        • Mahogany Toy Boxes: 612,000 GP
        • Treasure Chests: 612,000 GP
        • Armor Cases: 1.2 million GP
        • Guilded Clocks: 23.6 million GP
        • Guilded Wardrobes: 24 million GP

        If all these items sold, I would make a total profit of approximately 21.4 million GP, translating to a profit of 12 million GP and around 200,000 XP per hour.

        However, this was not a quick process. It took several months for half of the items to sell, and it became apparent that the full turnover would take around eight months. The method, while profitable, proved to be a long-term investment.

        Reflecting on the Journey

        Evaluating my experience with this money-making method depends on one’s perspective. For those who view the glass as half full, this method is a goldmine. It provides not only substantial profit but also valuable construction XP. On the other hand, if you’re inclined to see the glass as half empty, the lengthy wait and the investment tying up your GE slots might seem discouraging.

        The reality is that while this method can be incredibly profitable, it requires patience and a long-term commitment. The flatpack furniture market, while promising, is not a quick fix but rather a strategy for those willing to invest time and resources.

        Final Thoughts

        In conclusion, my journey to uncover a unique OSRS money maker led me to the niche world of flatpack furniture. By leveraging this underutilized market, I was able to generate substantial profits and gain valuable experience. However, the process highlighted the importance of patience and long-term planning in achieving financial success in OSRS.

        If you’re looking for a money-making method that few others are exploiting, flatpack furniture might be worth exploring. Just be prepared for the time investment required to see the full benefits. In the end, it’s a testament to the idea that in OSRS, sometimes the most lucrative opportunities are hidden in plain sight, waiting for the right player to discover them.

        Keep up to date with RSorder.com for Old School RuneScape content! You can also enjoy buying Runescape gold service here.

        The Guide to OSRS Ranged Weapon Crystal Bow

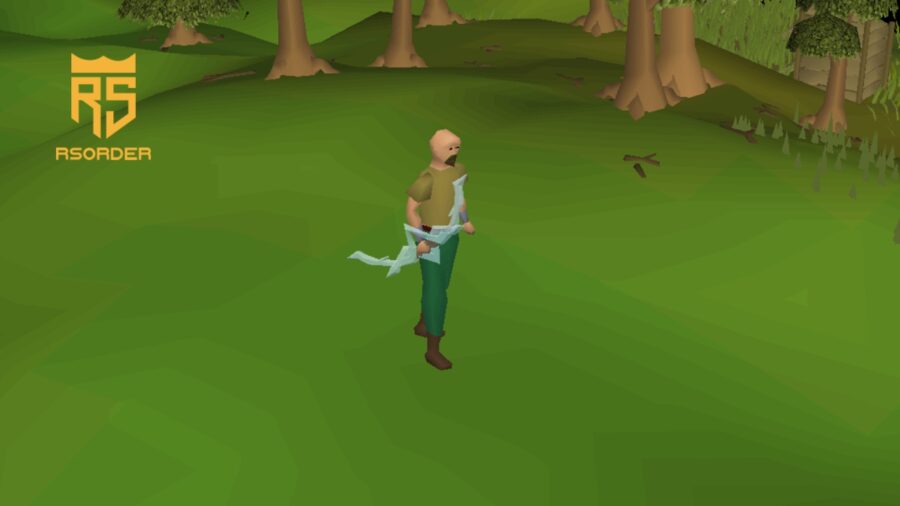
        In the vast world of Old School RuneScape (OSRS), the Crystal Bow stands out as a coveted ranged weapon revered for its unique properties and elegant design. Crafted from crystal seeds, this exceptional bow offers a range of features that make it a popular choice among players. With no ammunition requirements and the ability to regenerate its own ammunition over time, the Crystal Bow saves players valuable resources and enhances their combat prowess.

        Requirements and Item Stats

        To wield the Crystal Bow, players must first attain a Ranged level of 70. Once this requirement is met, they can unlock the full potential of this remarkable weapon. The Crystal Bow boasts impressive accuracy, and unlike traditional bows, it does not rely on ammunition. Instead, it consumes charges as it is used in combat.

        Degradation and Recharge

        As the Crystal Bow is used, it gradually degrades, resulting in a decrease in its stats. However, players can easily restore its power by recharging it with crystal seeds. These seeds can be obtained from the rare drop table or through various methods such as pickpocketing elves. The ability to rejuvenate the Crystal Bow ensures its longevity and continuous effectiveness in battle.

        Special Attack: Soulshot

        The Crystal Bow possesses a formidable special attack known as “Soulshot.” When activated, this special attack doubles the player’s accuracy for a single shot, providing a significant advantage against tough opponents. However, it is important to note that the Soulshot consumes 100% of the player’s special attack energy, requiring strategic usage in critical moments.

        Variants of the Crystal Bow

        In OSRS, there are two variants of the Crystal Bow, each with its own distinct qualities:

        Crystal Bow: The standard Crystal Bow can be equipped at Ranged level 70 and has a maximum of 2,500 charges. It offers reliable performance and is a worthy choice for players seeking a versatile ranged weapon.

        Crystal Bow (i): The imbued version, also known as Crystal Bow (i), surpasses its standard counterpart in power and endurance. To acquire this enhanced variant, players must imbue the Crystal Bow at the Nightmare Zone. Combining a Crystal Bow with an imbued crystal seed, players can unlock the Crystal Bow (i), which possesses a maximum of 20,000 charges. However, obtaining the imbued version requires a substantial investment of 1,000,000 Nightmare Zone reward points.

        Obtaining Crystal Seeds

        To recharge the Crystal Bow, players need crystal seeds, which can be acquired through various means:

        High-Level Slayer Monsters: Crystal seeds can be obtained as drops from challenging high-level Slayer monsters. Engaging in combat with these formidable foes can yield the valuable seeds necessary for renewing the Crystal Bow’s power.

        Zalcano: This powerful demon can also grant crystal seeds as a drop. Engaging in the battle against Zalcano presents an opportunity to acquire the seeds required for recharging the Crystal Bow.

        Elves in Prifddinas: By pickpocketing the agile elves in Prifddinas, players can occasionally obtain crystal seeds. This method requires a certain level of Thieving skill and offers an alternative means of obtaining the necessary resources.

        For players seeking to imbue the Crystal Bow, crystal seeds can be acquired using Tarddian crystals in Prifddinas or as a drop from the Hespori boss. Imbuing the Crystal Bow enhances its capabilities, making it an even more formidable weapon on the battlefield.

        The Crystal Bow, with its unique properties and elegant design, stands as a highly sought-after ranged weapon in OSRS. Its ability to regenerate ammunition, powerful special attack, and distinct variants make it a versatile choice for players across various combat scenarios. By understanding the requirements, mechanics, and methods of obtaining crystal seeds, players can fully harness the potential of the Crystal Bow and excel in their adventures throughout the realm of Old School RuneScape.

        Purchase OSRS Gold from RSOrder

        RSorder is the premier destination for obtaining cheap RuneScape Gold. RSOrder provides players with a top-notch assortment of in-game currency, ensuring an exceptional selection for sale. Count on RSOrder to deliver unparalleled service and dependable support, elevating your gaming experience to new heights.

        Page 1 of 2

        Powered by WordPress & Theme by Anders Norén