New Player Insights for Goblin Caves: Tips and Strategies from Fellow Adventurers

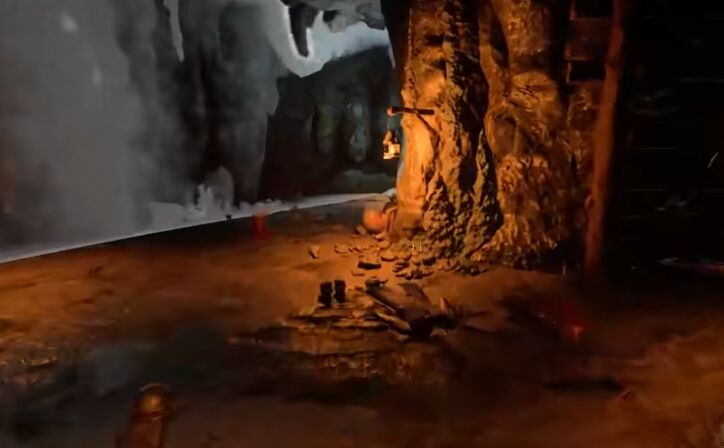
Greetings, fellow explorers of the depths. I’d like to share some insights that might help new players navigate the challenges of Goblin Caves more effectively. Feel free to contribute, critique, or share your own experiences – I don’t claim absolute truth here, just what’s been working well for me in the goblin-filled labyrinth.

1, Discover Your Fit: Don’t just jump on the trendiest class. Every class offers a unique playstyle. While that Ranger might seem godly, the Warlock could be your true calling. Experiment and find what resonates with you.

2, Embrace Patience: The dungeon isn’t going anywhere. Don’t rush to find loot, reach prime spots, slay bosses, or locate a portal. Take a breather, restore your health, plan your moves, and wait for your moment. If you’re uncertain, let enemy footsteps fade – patience can save your skin. Similarly, be patient with mobs. Don’t rush into attacks; counter when the time is right. Avoiding trash mob damage is a game-changer.

3, Bury Gear Fear: Cast it aside. Equip those +true physical/magic damage greens and let them shine in battle. Let your stash hoard gold and sellables – your gear is meant for adventure. The notion of curating a “perfect run” is overrated. Learning from losses prepares you for future challenges and inevitable gear losses.

4, Taming the Centipede: Facing the giant centipede can be daunting. Through trial and error, I’ve learned how to tango with it, even as a wizard. Create space to strafe in a circular motion, alternating directions after every attack cycle. Don’t engage in ranged combat; poison’s bite is deadly. Close-quarters combat with quick strikes yields the best results. Keep strafing while casting spells to maintain pressure.

5, Mastery of Mob Control: Controlling mobs improves with practice. Utilize environmental factors to hinder them – make them obstruct each other’s movement or use line-of-sight tactics against ranged enemies. Be mindful of mixed mob types in spacious rooms – retreat might be wiser.

6, Retreat Wisely: Know when to fold your cards. If you’ve amassed decent loot and spot a blue portal, seize it and escape. The next room could be your downfall. Prioritize survival over the allure of treasure.

7, Balancing Confidence: Confidence is key, but beware overconfidence. Push your limits, but don’t assume that a green falchion makes you invincible. Temper your aggression with strategy.

8, Map Familiarity: Study the map through repeated exploration. Monitor the mini-map for insights – when does the circle begin closing in? Keep an eye on the timer, and adapt your path accordingly.

9, Above All, Enjoy: Remember, it’s a game – have fun. Take breaks, hydrate, and stretch to stay sharp mentally. Maintaining a balance between gaming and reality is crucial.

Please contribute your own tips and differing viewpoints. I’m a fellow newcomer, and I thrive on discovering new knowledge and tactics. And I want to get more Dark and darker gold, give me some advice, thank you.

Related Dark and darker post: Discussion on Loot Rarity in Dark and Darker

Madden 24: Unveiling the Insane Free Packs and Players

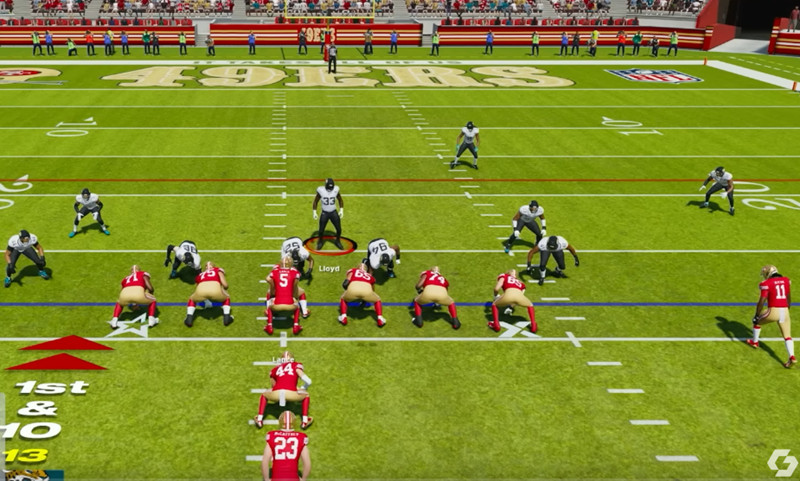
Welcome to the realm of Madden 24 Ultimate Team, where the exhilarating anticipation of the new season has gamers and football enthusiasts on the edge of their seats. In this edition, we’re diving into the four explosive free packs and players that are set to elevate your gaming experience. It’s essential to ensure that you’re not only picking the right card but also understanding when this incredible content will become available. So, let’s strap in and explore the exhilarating world of Madden 24.

Josh Allen Elite Player Item: The Core of Your Team

The first of these remarkable free packs come in the form of the Josh Allen Elite player item, exclusively available for those who opt for the deluxe edition of Madden NFL 24. The exhilarating buzz around this card was further stoked when EA Sports gave us a sneak peek into Josh Allen’s Core Elite card.

With an 86 overall rating, this card already shines brightly. Notably, his 87 throw power becomes a central highlight, given the pivotal role of a quarterback’s arm strength in executing precise and powerful throws. Moreover, the high throw on the run attribute is bound to be particularly handy in this year’s game mechanics, allowing more agile and effective plays. However, there’s a question lingering – is this really the card we’re receiving for free? While the stats seem promising, a hunch suggests that EA might opt for a slightly lower overall version, possibly around 83 or 84, for the free edition.

As for availability, the 14th is marked on the calendar as the probable release date for this electrifying card, aligning with the deluxe edition launch.

Demarcus Ware: A Defensive Powerhouse

Next up, we have the Hall of Fame player pack, a choice that no Madden enthusiast should overlook. The standout star of this pack is the Demarcus Ware card, embodying an 83-speed and 82 acceleration. Yet, it’s his block shed, power move, and finesse move that truly set him apart as an unparalleled defensive powerhouse.

When compared to other outside linebackers, Demarcus Ware’s card clearly overshadows the competition. Even the likes of TJ Watt, Hassan Reddick, and Marcus Crosby pale in comparison in terms of vital attributes. The verdict here is clear – Demarcus Ware is the unrivaled choice for this pack.

As for availability, you guessed it, the 14th is the day to look forward to.

Sauce Gardner vs. Justin Jefferson: The Controversial Choice

One of the most tantalizing decisions you’ll have to make revolves around the Sauce Gardner and Justin Jefferson choice. If you’ve pre-ordered the deluxe edition, you’ll be granted a pack to select one of these gems. Sauced with an 85 speed and acceleration, Gardner stands out as a defensive marvel. On the flip side, Justin Jefferson flaunts an 85-speed, securing his place as a top-tier wide receiver.

The prevailing strategy leans toward selecting Justin Jefferson. The reasoning? Wide receivers in Madden 24 are arguably scarcer, and the depth of top-tier corners makes Sauce Gardner a slightly riskier choice. The surge of free Rookie Premiere corners sweetens the deal for Gardner enthusiasts, making Jefferson a more strategic pick.

Both Gardner and Jefferson are scheduled for release on August 14th, promising an early treat for the gaming community.

Rookie Premieres: August 18th – Patience Rewarded

Lastly, we delve into the highly anticipated Rookie Premieres. If you’re wondering when these exhilarating prospects will grace your squad, mark August 18th on your calendar. In line with previous trends, it’s likely that EA Sports will introduce the Rookie Premieres into the game with the worldwide release, ensuring that you’re fully prepared to bolster your team with these potential stars.

In Conclusion

Madden 24 is poised to deliver an adrenaline-pumping gaming experience, and these four free packs and players are just the tip of the iceberg. With these free players and purchases of Madden 24 coins, your team-building journey can’t be more exciting. Remember to be patient with the rookie premiere on August 18th and continue the pursuit of gaming greatness in Madden 24 Ultimate Team. Whether you’re developing a long-term strategy or making a game-changing decision, this iteration of Madden promises to be an unforgettable journey. So, players, get ready, because this realm is yours to conquer!

Is the PvP zone getting overlooked here

Is the PvP zone getting overlooked here? The PvP region might not have gained much popularity due to the perception that PvP and Diablo aren’t inherently compatible. However, in my opinion, it stands as the best zone within the game, and I’m even drawn to play D4 primarily for that aspect. Let me explain why:

  • The zone boasts excellent density, particularly in the southern map, with a plethora of elite enemies.
  • It’s a hub of player activity. Opportune moments arise, like witnessing a player extracting seeds, prompting you to join them and assist if they’re primarily focused on PvE.
  • The area serves as a lucrative gold farming spot. The abundance of elite enemies results in numerous yellow items that can be conveniently sold in town, a mere few steps away from the zone.
  • It presents a meaningful incentive for grinding levels and items; a PvE build might not necessarily translate effectively to PvP.
  • Seeds, much like Obols, can be exchanged for items (e.g., 3k for Chest Armor, Gloves, Pants, or Boots) or skins.
  • Achieving a streak of player kills causes your name to be displayed on the map for 5 minutes, alongside earning additional seeds—a thrilling event.
  • Public events and a formidable boss contribute to the zone’s dynamic nature, fostering seed accumulation.
  • The exhilaration of defeating an elite group and then suddenly encountering a player who seeks to challenge you adds an exciting element, doesn’t it?
  • The upside of the PvP area is that your equipment isn’t destroyed upon being defeated. You respawn a short distance from the zone, merely 5 steps away.
  • The impact of being defeated isn’t paramount; acquiring seeds is relatively easy (barring moments when you possess 170k seeds and your name is showcased to everyone for 5 minutes, hehe).

Of course, the PvP area isn’t without its imperfections. Lag can sometimes be a concern, certain classes might exhibit advantages over others (Rogue being a prominent example), and some aspects might not function optimally against players. Nevertheless, the overall experience remains enjoyable. Whether it’s Diablo 4 PVP or PVE, you need strong gear and skills to back it up, MMOexp.com offers tons of cheap gear and Diablo 4 gold, contact us now.

The Race to Be the First to Get Blood Torva

The release of the awakened versions of the Desert Treasure 2 bosses has created a new challenge for the best players in RuneScape: who can be the first to get blood Torva?

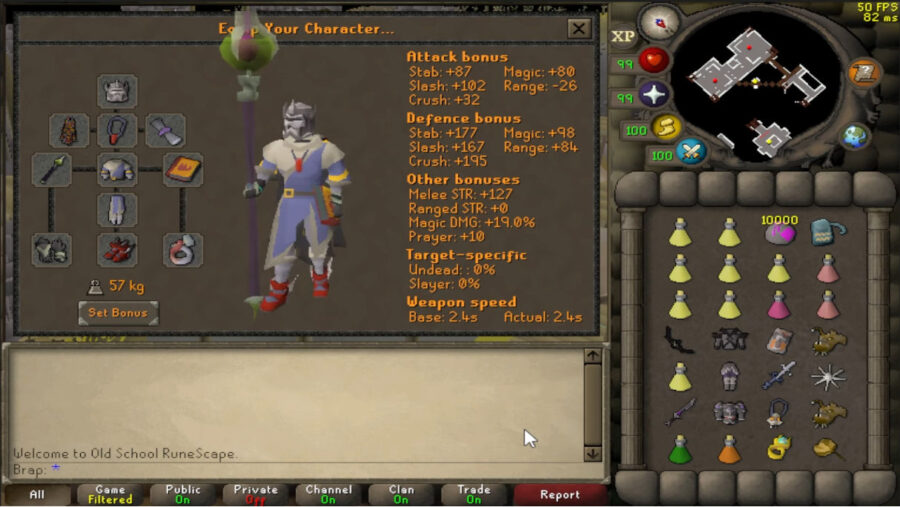
Blood Torva is a new, upgraded version of the Torva armor set. It is made with the ancient blood ornament kit, which can be obtained by killing all four awakened bosses.

The race to be the first to get blood Torva is already in full swing. The current leader is Sync, who has already killed three of the four awakened bosses.

Sync’s progress has been live-streamed on Twitch, and his fans have been following his every move. They have been cheering him on and offering advice as he’s tried to overcome the challenges of the awakened bosses.

The competition is fierce, but Sync is determined to be the first to get blood Torva. He’s been practicing for months, and he’s confident that he has what it takes to win.

The race to be the first to get blood Torva is a testament to the dedication and skill of the players involved. It’s also a reminder of the excitement and challenge that RuneScape can offer.

The Soul Reaper Axe

Another new item that was released with Desert Treasure 2 is the soul reaper axe. This axe is incredibly powerful, but it requires one untradable component from each of the four awakened bosses to make.

The first player to get their hands on a soul reaper axe was Eliop. He paid 3.2 billion gold for it, which is a record for any item in RuneScape.

Eliop has been testing out the soul reaper axe, and he’s been very impressed with its power. He’s been able to kill the awakened bosses very quickly, and he’s even been able to hit over 500 damage with it.

The soul reaper axe is a very rare and powerful item. It’s not clear how many of them are in the game, but it’s sure to be a hot commodity among high-level players. It means that this has a high investment value, to earn the OSRS Gold price difference!

The Bugs

Unfortunately, the release of Desert Treasure 2 has been somewhat marred by bugs. One of the most notable bugs is with the soul reaper axe.

The soul reaper axe was originally bugged in such a way that it could deal massive damage to other players. This bug was quickly fixed, but it caused a lot of chaos in the Wilderness.

Another bug that has been affecting the awakened bosses is that they can sometimes spawn in inaccessible areas. This has made it difficult for players to kill them, and it’s something that Jagex is currently working to fix.

Despite the bugs, Desert Treasure 2 has been a successful update. The awakened bosses are a challenging new challenge for players, and the soul reaper axe is a powerful new weapon.

It’s still too early to say how the awakened bosses will impact the overall meta of RuneScape, but they’re sure to be a popular addition for high-level players.

Dominating the NBA 2K23 Court: Exploring the Shaquille O’Neal Build

Shaquille O’Neal, known for his dominant presence on the basketball court, is considered one of the most formidable players in NBA history. In NBA 2K23, we take a closer look at the Shaq build and put it to the test in various game modes. With this build, we aim to assess just how dominant it can be in the virtual world.

Building the Shaquille O’Neal Build

The Shaquille O’Neal build comes with some of Shaq’s signature animations, including his post hook. While this animation may not be the best in the game, it presents a challenge as the build relies heavily on post moves. Equipped with Shaq’s free throw and dunk animations, the build shows promise. However, when it comes to the jump shot, a different approach is needed. The build incorporates Manute Bol’s base with Chris Bosh as the release one and Giannis Antetokounmpo as the release two.

Attributes and Badges

To ensure effectiveness in all game modes, the Shaquille O’Neal build boasts a well-rounded set of attributes and badges. With 44 finishing, 12 shooting, 20 playmaking, and 20 defensive badges, the build is designed to excel on both ends of the court. NBA2king is the safest place to buy NBA 2K MT game assets. Can be 100% guaranteed to be delivered exactly as described or your money back.

Testing the Build in Different Game Modes

To evaluate the build’s performance, we take it to the ones, twos, threes, and the wrecked center. Each game mode presents unique challenges and opportunities to showcase the build’s dominance.

In the one’s mode, where speed is not of utmost importance, the Shaq build proves its worth. Despite a relatively low-speed rating, the build compensates with its strength and post moves, overpowering opponents in the paint.

Transitioning to the twos mode, the build faces a two-way stretch opponent. While guarding the perimeter may pose a challenge, the Shaq build’s shooting ability adds versatility to its arsenal. Utilizing post moves and taking advantage of mismatches allows the build to shine.

Moving on to the threes mode, the build’s lack of speed becomes less of a concern. Its strength and ability to dominate in the paint overpower opponents, leading to easy baskets. The build’s slasher post-score takeover adds an extra layer of dominance, making it a force to be reckoned with.

Finally, in the wrecked center, the Shaq build’s true potential is unleashed. With a combination of strength, post moves, and high-finishing attributes, it wreaks havoc on the court. The build’s ability to dunk over opponents and convert difficult layups makes it a nightmare for defenders.

Conclusion

The Shaquille O’Neal build in NBA 2K23 showcases the dominance that made Shaq a legend in the NBA. Despite some limitations in speed and shooting, the build compensates with overwhelming strength, exceptional finishing, and versatile post moves. Whether playing in the ones, twos, threes, or the wrecked center, the Shaq build proves to be a force to be reckoned with, overpowering opponents and dominating the game. Its ability to score at will and contribute on the defensive end makes it a valuable asset in any game mode. If you’re looking for a build that embodies Shaq’s dominance, the Shaquille O’Neal build in NBA 2K23 is certainly worth exploring.

FIFA 23: A Testament to Gaming Greatness

In the ever-evolving landscape of video games, few titles can stake a claim to being the best of all time. However, FIFA 23, the latest installment in the long-running FIFA franchise, possesses a host of compelling features and innovations that position it as a strong contender for this prestigious title. From its stunning graphics and immersive gameplay to its robust multiplayer modes and dynamic player interactions, FIFA 23 has raised the bar for sports simulation games, making it a testament to gaming greatness.

Unparalleled Realism
One of the standout features of FIFA 23 is its unparalleled realism, which sets it apart from its predecessors and other games in the genre. Powered by cutting-edge technology, FIFA 23’s graphics bring football to life like never before. The level of detail in player models, stadiums, and animations is truly remarkable, offering an immersive and lifelike experience. Whether it’s the glistening dew on the pitch or the sweat dripping down players’ faces, every element contributes to the game’s authenticity, captivating players and making them feel like they’re part of the action.

Innovative Gameplay
FIFA 23 introduces a range of innovative gameplay mechanics that revolutionize the way players interact with the game. The enhanced ball physics provide a more realistic feel, accurately replicating the trajectory, spin, and weight of the ball. This adds a new layer of depth to gameplay, requiring players to employ strategic thinking and skillful execution to succeed.

Moreover, FIFA 23 introduces the Adaptive AI system, which utilizes machine learning algorithms to adapt the behavior of computer-controlled opponents. This results in more challenging and dynamic gameplay, where AI opponents learn from players’ strategies and adjust their tactics accordingly. This innovation ensures that each match offers a fresh and unpredictable experience, keeping players engaged and constantly on their toes.

Immersive Game Modes
FIFA 23 boasts an extensive array of game modes that cater to every player’s preference, ensuring endless hours of entertainment. The Journey, a narrative-driven single-player mode, allows players to follow the journey of a young footballer as they navigate the trials and tribulations of a professional career. This mode not only showcases the game’s exceptional storytelling abilities but also offers a deeper connection to the game’s characters.

For those seeking a competitive edge, FIFA 23 features an expanded Ultimate Team mode. Players can build their dream team by acquiring and managing virtual player cards, engaging in thrilling online matches against opponents from around the world. The inclusion of live events and challenges adds a layer of dynamism to the mode, encouraging regular engagement and rewarding dedicated players.

Social Interactions
FIFA 23 leverages the power of social interactions, transforming the game into a platform for connecting and competing with friends. The introduction of Volta Football, a street football mode, allows players to team up or go head-to-head with their friends in vibrant, urban settings. Whether it’s a casual match or a highly competitive tournament, FIFA 23 facilitates meaningful social experiences and fosters a sense of camaraderie among players.

Furthermore, the game’s online multiplayer mode enables players to engage in global competitions, creating a thriving and interconnected community of football enthusiasts. The ability to compete against real-life opponents enhances the game’s replayability and adds a layer of excitement that transcends the virtual world.

Continuous Support and Updates
One of the key factors that contribute to FIFA 23’s standing as the best game of all time is the ongoing support and regular updates provided by the developers. Electronic Arts (EA) has a proven track record of delivering timely patches, gameplay tweaks, and new content to ensure the game remains fresh and engaging long after its release. This commitment to quality and player satisfaction demonstrates the dedication of the developers to provide an exceptional gaming experience.

Summarize
FIFA 23’s stunning graphics, innovative gameplay mechanics, immersive game modes, social interactions, and continuous support combine to make it a standout title in the gaming industry of FIFA 23 Coins. Its unparalleled realism and attention to detail transport players onto the pitch, allowing them to experience the excitement and passion of football like never before. As FIFA 23 pushes the boundaries of sports simulation games, it sets a new standard for gaming excellence, solidifying its claim as the best game of all time.

OSRS Trailblazer Rewards

A new league was added onto the Old School RuneScape platform at the end of 2020, which lasted till the start of 2021. Yes, the development process began in June, and the players were entirely set to participate in this league. That’s why today we’ll be looking into what the OSRS Trailblazer League has to offer to the in-game players in terms of rewards.

Trailblazer League

As an OSRS player, you will first start off in Mishtalin for the osrs Trailblazer league, where various regional areas are unlocked after completing specific tasks. However, there’s one area named Karamja, which requires no task to unlock and is available to you from the very start. You won’t be able to access the entire map, and you can only choose three areas from the options; Fremennik Isles, Kharidian Desert, Tirannwn, Morytania, Asgarnia, Kandarin, Misthalin, Karamja, and Wilderness.

During the league, every player will turn into an Ironman, and you will have to complete the tasks with the same restrictions as a regular Ironman, which means you cannot trade. You’ll notice that the shops available in the accessible areas have more stock and higher restock rates. There will also be changes added to the mechanics of bosses across the regions.

Tasks

The tasks that you participate in will grant you league points, and you can also unlock osrs Trailblazer relics that will provide you with various buffs. The tasks that you choose will depend on the difficulty level, such as Easy, Medium, Hard, Elite and Master, and they will also include overcoming requirements like raising the levels of your skills or beating bosses across different regions.

There are over 960 Trailblazer tasks available, and they will be divided into specific areas. The tasks can range from crafting Water Runes to Cooking Sharks, Equipping Weapons, Defeating Bosses, or Entering Guilds.

Relics

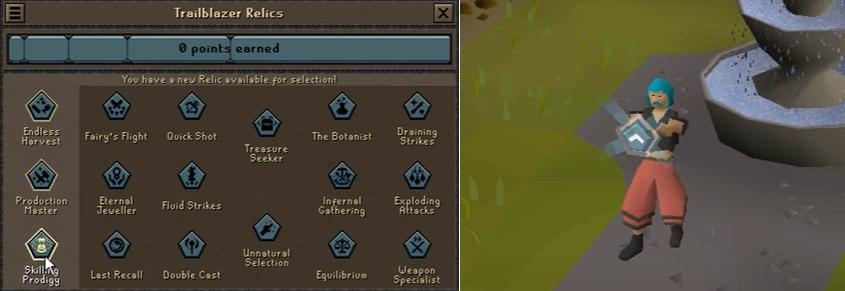
Once you have enough League Points, you will be able to unlock various osrs Trailblazer Relics that can provide you with buffs (as mentioned above). These buffs can consist of combat powers, additional experience boosts, skill buffs, and luck. After finishing the League’s Tutorial phase, you will have the option to choose from three Relics, that have a total of six tiers. Each tier will represent a different feature of OSRS, ranging from skilling to combat utility and transportation.

Additional Information

There are many new features that you can look forward to during the osrs Trailblazer League phase. For instance, a new area interface, which provides you with the unlocked areas information, and you can also view which places are unlocked and its key features when you select a particular region. There’s also achievement diaries and quests for a particular area that are available to you.

Thanks to the separate task completion system, there’s now a proper balance in the gameplay when you complete high-level and low-level tasks. A new PVP (Safe) system has also been added to the wilderness, which allows players to gain access to certain areas, and the fun fact is that you don’t lose your items.

Rewards

You can unlock various rewards to use within the game during the Trailblazer league. You can also unlock rewards that are color-coded from Beige, Brown, and Blue, where the first two colors are chosen as they represent the leagues’ colors, and the third color which represents the sky.

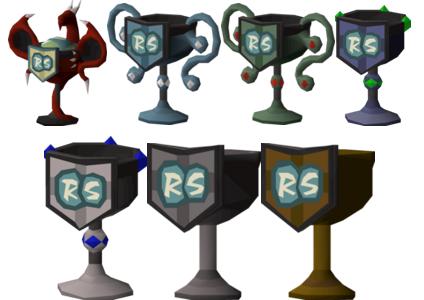
Upon reaching the end of the league, you will get a chance to obtain a cosmetic trophy, which can be wield depending upon your existing tier level. The trophy won’t affect any of the League Points that you have earned and collected. The Bronze to Mithril trophy is a shield-slot item, and Adamant to Dragon trophies are two-handed items. Each of the trophies has its own unique emote, which can obviously be used by right-clicking it.

Speaking of the polled rewards, there’s the Trailblazer Graceful Set Ornament Kit where costs a lot of League Points and includes six different recoloring kits. There’s also the Trailblazer Relic Hunter Outfit, and the Trailblazer Rug (can be placed in your P.O.H), which are both expensive too.

You can also obtain Dragon Skills Tools Ornament Kit that can be used on Dragon Axes, Dragon Pickaxes, Dragon Harpoon in order to recolor them. Other than that, there’s a Globe Statue and Themed Banner, which can be placed in your Player-Owned House, a Home Teleport Animation, and a League Room, which requires 27 Construction and 15,000 OSRS Gold coins to construct in your Player-Owner House.

D2R Act 3 Walkthrough

Act 3 begins at the Kurast Docks, which is your new home now. As soon as you enter, speak to Hratli, who is the town’s blacksmith. Once you leave town to progress, he’ll move back to his original spot, which is in the middle of the village. In act 3, you’ll get a better idea of what build you’re going to target. Besides that, it’s recommended that you ignore the magic equipment drops and focus on charms as they’re known to be useful. Yes, your gear will get you resistance, but at lower levels, it’s better to have assistance, for d2r act 3 quests.

The Golden Bird (Quest #1)

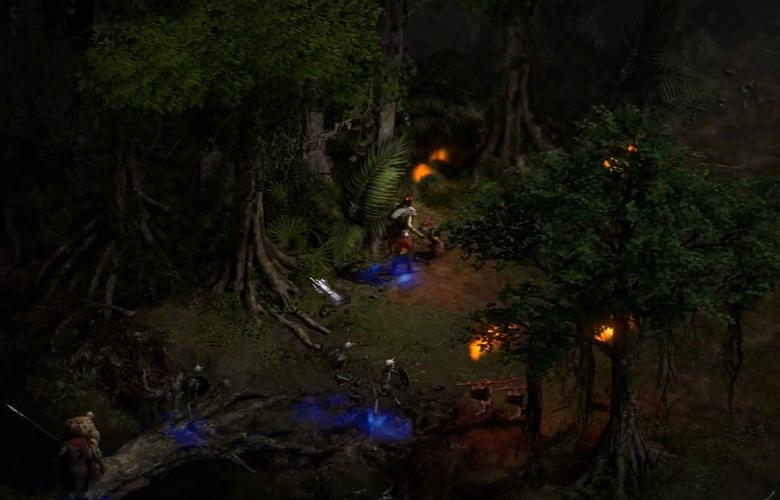
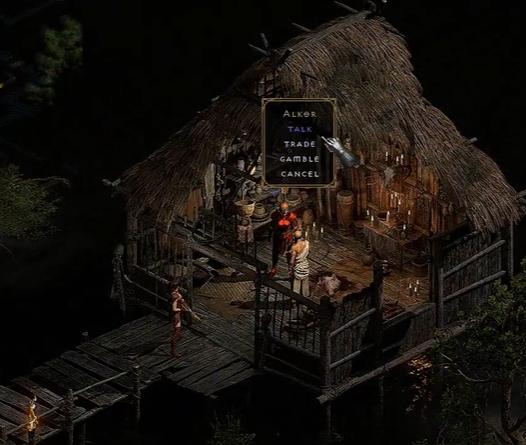
As you leave the town, you’ll encounter Diablo in the form of a Lonely Wanderer. You won’t be able to attack him, and he’ll vanish soon; however, he’ll leave behind a horde of beasts that need to be quickly killed for d2r act 3 quests. As you continue ahead, you’ll encounter a Unique or Champion monster that needs to be taken down to obtain the Jade Figurine. Take the Diablo 2 Resurrected Item back to town and hand it over to the NPC named Meschif to receive a Golden Bird, which then needs to be taken to Alkor, who’ll give you the Potion of Life. This potion grants +20 HP.

Blade of the Old Religion (Quest #2) + Khalim’s Will (Quest #3)

Generally, the majority of players locate the Spider Cavern first, which is located somewhere within the Spider Forest. You need to pay attention as there is also another dungeon there known as the Arachnid Lair, which is optional. Within the Cavern, you’ll face off against several Flame Spiders and a mini-boss. Quickly take them down and open the golden chest to obtain Khalim’s Eye, for diablo 2 act 3 quests.

Next, head to the Flayer Dungeon, located within the Flayer Forest. Once you locate the entrance, you have to click on the large alter to trigger a spawn of monsters. Deal with them to obtain the Gidbinn in the form of a drop for diablo 2 act 3 quests. You need to take the item back to the town and hand it to Ormus. After that, speak to Asheara, and Ormus will hand you a rare ring as a reward for completing the Blade of the Old Religion.

Head back down into the Flayer Dungeon and fight the monsters along your path. In the end, you’ll encounter a mini-boss in the versions of a Shaman. Take it down, open the golden chest, and pick Khalim’s Brain from it, for the diablo 2 quest guide. Continue ahead until you find the City of Kurast. You’ll encounter Zakarum Priests, Thorned Hulks, Faithful, Zealots, and Baboon Demons here.

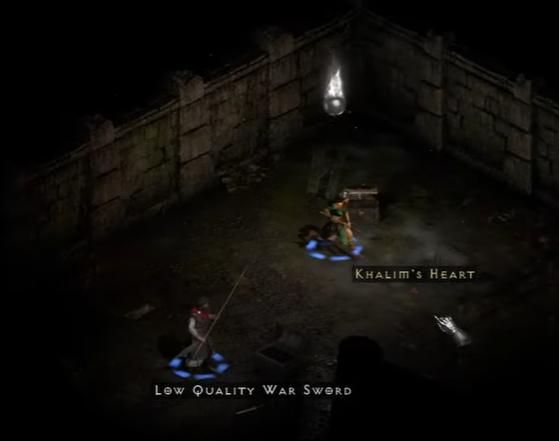
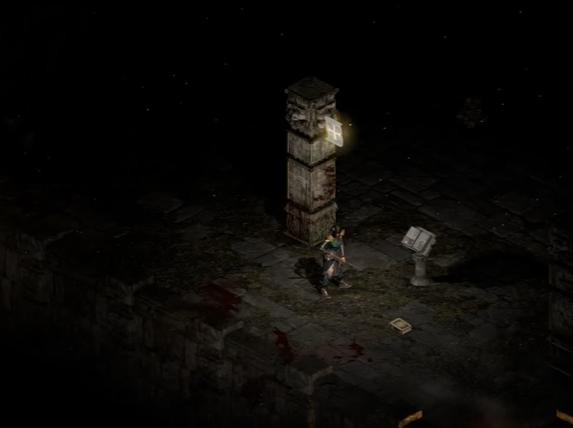
You need to look for the Sewers within the town and walk around the edge of the map to locate a golden chest that has Khalim’s Heart in it. Now, you need to locate Travincal by walking through the areas of Kurast. At the end of Travincal, you’ll encounter several Council Members that need to be taken down to obtain the final items called Khalim’s Flail. Place the three items within the Horadric Cube and transmute them for the diablo 2 quest guide. After that, use the powered Flail to smash the Compelling Orb at the council area to gain access to the Durance of Hate.

Lam Esen’s Tomb (Quest #4) + The Blackened Temple (Quest #5)

Before you begin the quest, you need to first enter Kurast, and only then speak Alkor. He’ll task you to search six tombs in the Bazaar, Causeway, and Upper Kurast. The only one you need to go into is the Ruined Temple in Bazaar. Within it, you’ll encounter Battlemaid Sarina, and it’s recommended that you clear out the mods before approaching her.

The Guardian (Quest #6)

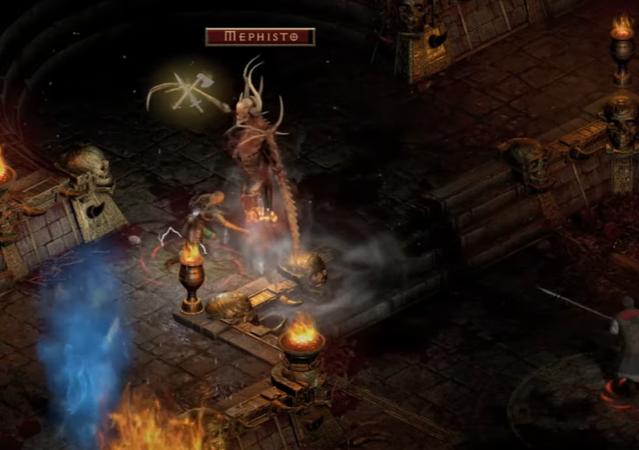
Now it’s time to fact the act 3’s boss called Mephisto. You need to enter the Durance of Hate and stick to the left-hand wall to reach level 3. Make sure that you grab the waypoints on each level to save time in the future. You’ll encounter powerful variants of Vampires, alongside Maulers, Blunderbores, Cadavers, and Stygian Dolls.

When you hit level three, you’ll come across a few more powerful monsters, alongside Council Members and Mephisto himself. Defeat the minions before approaching the boss, and players usually approach Mephisto from the right while fighting Maffer Dragonhand as he doesn’t teleport around.

The best advice is to let the boss target your summons or hirelings so that you can get up close and deal damage. Another way is to lure him toward the moat of blood in the area, and then run around him so that he’s stuck there. You can easily use ranged to take him down after that. It’s a good strategy for classes like Sorceress, who can use Teleportation spells to lock him. Once he’s dead, pick the Soulstone, and then head through the red portal to reach the area for act 4.

New World JewelCrafting Leveling Guide

From the seven crafting-based trade skills available in the New World, Jewel Crafting is one of them. You are free to choose the crafting profession you prefer depending upon the items you’re looking to make.

Jewel Crafting allows you to craft various trinkets like Rings, Amulets, and Earrings that offer passive bonuses to your character. These bonuses are important when you’re creating a specific build to enhance your comfortability during battles. Besides that, you can utilize the skills to craft gems that are socketed into armor and weapon slots for new world jewelcrafting guide.

In the following guide, we will be covering every minor detail that is related to Jewel Crafting, alongside the most efficient way to power level. So, if you wish to craft items of higher tier levels, then there’s no better spot for you to continue reading.

Materials & Skills Required

Jewel Crafting needs a lot of resources that can either be gathered, refined or traded with other players in the game. You are free to choose your preferred means of obtaining the materials for new world leveling jewelcrafting.

The main resource while leveling up are metals like Embedded Gems and Silver that determine the bonuses of the crafted item. Besides that, the skill relies upon other crafting-based skills for materials, such as Mining, Arcana, Smelting, and Stone Cutting.

What are the benefits?

A powerful skill that offers players passive allows, while also allowing you to create items for your equipment pieces. Higher Jewel Crafting level means better variants of trinkets and gems, which in turn offers better stats to your character for new world jewelcrafting guide.

How to level up?

There’s no fixed method of leveling up Jewel Crafting in the game; however, we have picked the best method that allows you to quickly max out. You’ll be crafting the same trinkets at the very beginning until you reach the level where you unlock better possibilities or new world leveling jewelcrafting.

The only crafting item you will need is a Flawed Gemstone Amulet. Yes, you can utilize any gemstone and combine it with a Silver Setting, Ingot, and Chain. You need to craft a total of 8,591 amulets to max out your Jewel Crafting skill.

Level 0 to 6

You’ll need to make 51 Silver Settings at the Outfitting Station. The materials required are – 204 Silver Ingots or 816 Silver Ore.

Level 6 to 12

You’ll need to make 51 Silver Chains. The materials required are – 255 Silver Ingots or 1020 Silver Ore.

Level 12 to 50

You’ll need to make 51 Flawed Gem Amulets. The materials required are – 51 Cut Flawed Gems or 51 Flawed Gems and 102 Motes, 51 Silver Ingots or 204 Silver Ores, 51 Silver Setting, and 51 Silver Chain.

Level 50 to 53

You’ll need to make 103 Silver Settings. The materials required are – 492 Silver Ingots or 1968 Silver Ore.

Level 53 to 55

You’ll need to make 103 Silver Chains. The materials required are – 615 Silver Ingots or 2460 Silver Ore.

Level 55 to 100

You’ll need to make 97 Tempered Emerald Ring. The materials required are – 97 Cut Emerald, 97 Silver Band, 97 Silver Setting, and 97 Silver Ingot.

Level 100 to 102

You’ll need to make 329 Silver Settings and Silver Chains. The materials required are – 2962 Silver Ingots or 816 11844 Silver Ore.

Level 102 to 150

You’ll need to make 312 Brilliant Pearl Ring. The materials required are – 312 Brilliant Pearl, 312 Silver Band, 312 Silver Setting, and 312 Silver Ingot.

Level 150 to 151

You’ll need to make 680 Silver Settings and 680 Silver Chains. The materials required are – 6120 Silver Ingots or 24480 Silver Ore.

Level 151 to 200

You’ll need to make 680 Pristine Gem Amulets. The materials required are – 680 Cut Brilliant Gems or 680 Pristine Gems, 13600 Gems, 13600 Wisps, 40800 Flawed Gems, and 13600 Weak Solvent, 3400 Essence or 13600 Wisps and 68000 Motes, 680 Quintessence or 2040 Essence, 8160 Wisps, and 40800 Motes, 680 Weak Solvent, 680 Silver Ingots or 1316 Silver Ores, 680 Silver Settings, and 680 Silver Chains.

OSRS 1 to 99 Rune Crafting Guide

The following guide showcases the most efficient way possible to reach level 99 Rune Crafting. We’ll be covering various strategies for both F2P and P2P members of the game. So, let’s begin!

Quests

Here are a few quests that you can consider completing to break the monotony: Ascent of Arceuus, Enter the Abyss, The Slug Menace, Temple of the Eye, Devious Minds, The Fremennik Exiles, Lunar Diplomacy, The Eyes of Glouphrie, and What Lies Below.

Some quests reward XP lamps or books, which can be used to gain Rune Crafting Experience: X Marks the Spot, Client of Kourend, Fairytale 2, A Tail of Two Cats, The Great Brain Robbery, King’s Ransom, Darkness of Hallowvale, A Taste of Hope, A Kingdom Divided, Architectural Alliance, In Search of Knowledge, Curse of the Empty Lord, One Small Favor, Recipe for Disaster, and Sins of the Father.

Supporting Items

The items mentioned in this section can help you increase the efficiency of your training, making it faster and simpler. It’s not a necessary requirement, but it’s best you at least get ahold of some to make the grind worthwhile.

You’ll need a Lunar Book for the Magic Imbue spells and NPC Contact. As there will be a lot of running around, you can equip weight-reducing gear (Graceful Outfit) for its benefits. Potions like Stamina and Energy will help refill your run points whenever required. Ring of Dueling will be a good asset for quick teleports, while Necklace of Binding will guarantee the creation of combination Runes.

Strategy

We’ll start this guide by explaining the best ways to train Rune Crafting as a F2P player of the game, and then slowly move on to the ways for P2P players.

To point out the facts, it’s easier to level up as a member because you have a lot of time thanks to the benefits it unlocks. So, if you’re serious about maxing out, we suggest you get a membership.

F2P Players

Level 1 to 8

At level 1, you’ll start by crafting Air Runes. You’ll first need to purchase Rune Essence from other players, or the Grand Exchange. You can stack as much as you want because you’ll also be needing the essence for other Runes as your progress. The Air Altar is located south of Falador city, and where you can craft Air Runes.

Level 9 to 19

At level 9, you can start crafting Earth Runes. Similar to Air, you’ll need Rune Essence for these. Grab an inventory and head northeast of Varrock to locate the Earth Altar. Considering banking in east Varrock as it’s the closest to you.

Level 20 to 99

At level 20, you have two options; you can either level up quickly or save the stack of OSRS GP you have. Whichever path you walk on, you need to continue it all the way to level 99.

The first option involves crafting Body Runes. These require Rune Essence once again. The altar is located southwest of Edgeville. You need roughly 1.7M Rune Essence to max out, which rounds off to 31M OSRS Gold. You can sell them back to get back 10 to 15M at the end.

The second option involves crafting Water Tiaras. You can do this by combining a Basic Tiara with a Water Talisman, both of which can be purchased from the Grand Exchange. The altar is located a bit south of the Lumbridge Swamp. You’ll lose about 72M in this process.

P2P Players

We advise you to purchase Rune Crafting Pouches to make the journey smoother. These pouches allow you to craft more runes per trip than you usually do.

Small Pouch can carry 3 extra essences, while Medium can carry 6, Large can hold 9, and Giant can carry 17, but you can use them at levels 1, 25, 50, and 75 Rune Crafting, respectively. It all rounds up to 30 extra essences per trip.

Level 1 to 34

First, unlock access to the Abyss by completing the ‘Enter the Abyss’ mini-quest. The requirement to complete the quest is another quest called Rune Mysteries so make sure you finish that first.

Within the Abyss, you are required to run through monsters and obstacles to reach various Rune Altars. You need a decent Agility and Mining level to decrease the chances of failure. Anyhow, start crafting Air Runes till your reach level 9, and then switch to Mind Runes till level 35.

Level 35 to 64

Now, at level 35, you need to switch your ways to crafting Chaos Runes till level 44, followed by Nature Runes with Pure Essence till level 65. You can make a nice profit of 5.5M from crafting Nature Runes. You can also switch to Law Runes at level 54 for faster XP.

Level 65 to 99

Start crafting Death Runes at level 65, and continue the same till you reach level 91 Rune Crafting. Next, switch to Blood runes until you max out the skill.

Using the methods we showcased in this guide, you can make a good profit of over 100M RSGP, and it’s all thanks to the Abyss.

We suggest you use an Amulet of Glory to teleport back to the bank because you automatically get skulled when entering the Abyss. You can come across dangerous situations now and then.

Conclusion

Looks like we’ve covered all the important segments of training the Rune Crafting skills. We hope this guide will help you through your journey. Good luck!

Page 3 of 4

Powered by WordPress & Theme by Anders Norén